|
|
| Home | Marine Aquariums |
Freshwater Aquariums |
Planted Aquariums |
Brackish Systems |
Ponds,
lakes & fountains |
Turtles & Amphibians |
Aquatic Business |
Aquatic Science |
Ask the WWM Crew a Question |
| Please visit our Sponsors | ||||
overflow and <base> rock question 8/22/12
Plumbing Nightmare; another not-reef-ready set of
trials 3/2/12 40 breeder set-up... pump/plumbing size
f' 3/1/12 New 90 Gallon RR tank. To (re) or further
drill holes or not 7/10/11 question re. painting internal overflows
5/26/2010 Mag12 on Drain Line? (Don't do it'¦)
-- 06/01/09 3 Gallons Mantis of Confusion/Overflows
5/25/09 Re: 3 gallons mantis of confusion/overflows
5/25/09 Sump design/internal overflow
4/20/09 Overflow 12/1/08 I'm sorry if any of this is obvious as I am new to the hobby. I have a 55 gallon all glass reef tank with 60 lbs of live rock and 40 lbs of live sand (I need more) that I would like to install a refugium on to aid nitrification and ammonia reduction. <Worthwhile addition.> I've been looking into getting a siphon overflow box (my tank is not drilled). But I'm worried that if the power goes out, the return powerhead will stop, so the aquarium- to-refugium siphon will stop. <A possibility with these.> When the electricity comes back on, the return powerhead will flood the main tank. Is there any reliable way to drill a hole in the main tank? <If the back panel is not tempered, yes. Some manufacturers temper all panels on 55s, some only the bottom. Check with the manufacturer of your tank to see, then check out my site for drilling yourself: http://reefercentral.com/drilling_video.html.> Or is there any way to make siphon overflow boxes work? <They can work fine, it is best to have two for redundancy, a back up for the scenario you list above. It is best to have redundancy with any type of overflow.> And how can copepods grown in the refugium to get into the main aquarium without dying in the refugium-to-aquarium powerhead? <Not really a concern, they will make it through the pump just fine.> Thank you for your time. <Welcome, Scott V.> Re: What would you do? Choosing a tank, overflows. 11/21/08 In regards to the two overflows and throughput, am I better getting trapezoid or square overflows? Thanks again. <Really no difference functionally. So long as you have enough room to fit you pipes, go for whatever look you like. Welcome, Scott V.>
Carbon placement 6/16/08 Happy daddy's day to all!!! <Yikes... am looking in the mail box for cards from far away as usual...> Three quick questions... is it better to put the carbon bag (Chemi pure) in the overflow box, in the sump under the drain by the sack or put it in the sump and place a power head (Maxi Jet 600 or 900) for added flow? Thanks/Jun <I like to keep "things" out of overflow boxes... too much chance of disasters with reducing, blocking flow there... I like to place some sort of mechanical media (Dacron batting or such) over this fine product and other chemical filtrants (to reduce clogging)... Bob Fenner>
Overflows 11/4/07 Hi Crew Hi I have a problem I hate to bug you about but couldn't find on your site. <Hello, Scott V. with you, no problem.> Someone gave me a 220 gallon tank. It's center-bottom drilled for three one inch bulkheads. I was going to use the left and right ones for sump drains and the center for a teed off return from a Mag 18. I was planning on just using one inch pipes from the bulkheads with 3 inch reducer fitting on top of them with slots cut in them for overflows. I cant find any overflow to do it different except corner overflows. Would this be a decent set up? <This could work, but you do lose some surface skimming ability.> I was wondering if you would have an idea of how many GPH my 1 inch overflows would have? <On paper 600 gph each, in reality only 300 to 400 maximum safely.> Would you know of a company that makes overflows for center drilled tanks that I can silicone in or use my 1 inch bulkheads? I'm afraid that these will be too small. Any advice or input would be appreciated. <I'm sorry to say, but these bulkheads will definitely be too small for a Mag 18. You could possibly drill the bottom for more/bigger holes if the glass panel is not tempered. Another possibility would be to use the three holes for an input and outputs for a closed loop and drilling the back for an overflow to handle the Mag 18. You can contact Mike@Glass-Holes.com . He will be able to help you with overflow options as well as building a center overflow.> Thanks for all past and present! <You're welcome, thank you, Scott V.> HELP - 72 Bow flow issues. Or lack of!! 10/16/07 Hi all, <J und K> We currently have an AGA 72 bow reef tank. It came with an external overflow box which is supposedly rated for 600GPH. This dumps into an AGA 20L sump filled with "dead rock", which was to supposedly become live over time, according to the LFS. <Do like your use of the conditional "supposed" here> We're at about 8 months along since setting it up. The 20L also houses a 300W heater, 2 bags of Boyd's Chemipure, a Coralife Super Skimmer 125 (which I've found to be quite temperamental with regards to water levels in the sump) and a Mag 7 for a return back to the display via a 3/4" PVC spray bar at the bottom of the tank behind the 100 lbs live rock. <... this arrangement does NOT produce 600 GPH in flow through> I wanted to improve the flow a bit to better distribute the incoming water to the display (stagnant areas). So I upgraded to a Mag 9.5 and plumbed a new 3/4" PVC return bar with 4 - 1/2" valved (modular plumbing) outputs at the surface of the display. <Uhhh... the supply... overflow three quarter can't supply this...> It also contains a check valve, gate valve (thankfully) and 3-9o's with a 4' head. Did some calculations and thought this would work much better than what I had. I couldn't have been more wrong! Thankfully I installed the gate valve. It currently is at about 1/2 - 3/4 open. So much for improved flow. My wife and I love having the tank in the family room. The inhabitants have become family! She is also dead set on the 72 Bow. SO, feeling that my set up is inadequate, I want to try and make it as ideal as I can. Inhabitants (All 1 - 2"): 1 - Percula clown 1 - Half Percula, half Saddleback clown 3 - Green Chromis 1 - Blue Chromis 1 - Pseudo Fridmani 1 - Lawnmower Blenny 1 - Blue Spotted Goby 1 - Firefish Goby 1 - Flasher Wrasse 1 - Cleaner Shrimp 1 - Peppermint Shrimp 6 - Astrea Snails 1 - Flame Scallop 1 - Feather Duster 1 - Cabbage Leather 1 - Finger Leather 1 - Torch 1 - Xenia Asst Frags of Zoo's and Mushroom Polyps <A real mix> My next step here is to just buy a new 72 Bow with the "mega flow" (I know it's not really) built in. <Okay> Using both to supply the sump. Will 1" for both be ample or would you recommend a larger size? <Much larger, and greater in number for the outgoing...> Will the new Mag 9.5 I purchased be sufficient for proper tank turnover? What would you recommend as far as return plumbing? Size? Number of outputs? Designs? <Yes, All posted... Please read here: http://www.wetwebmedia.com/marsetupindex2.htm the fourth tray down...> The sump probably needs a little upgrade too, but I'm limited in space in the stand do to the bow design. Any suggestions here? The skimmer is not "super". Again, any suggestions? <A hang on skimmer of use... perhaps a Remora... will save room... Designs in the second tray in the aforementioned link... on sumps, refugiums...> Thank you all, for a great website!! Jack & Kim <Please use it. Bob Fenner> PS.. Is it possible to transfer all inhabitants (gravel & water included) into a new tank and not have to weather any kind of cycling? <Oh! Yes> Seeding Live Sand/Figuring Out Overflows -- 08/06/07 Hello Crew, <<Greetings Adam>> Thanks for your continued effort in this incredible hobby. Without your help, I really don't think I would have had the same confidence I have now going into this new adventure. <<Were pleased to be here to assist>> I just received my 30lbs of Fiji, and 10lbs of Tonga live rock on Saturday (yesterday morning!) and I put it in the tank. So, right now, I've got about 105lbs of sand (Sugar-fine, and I've also made a little "lake" of crushed coral) and 40 lbs of Live rock. (I have a 30 gallon tank, btw). <<Hmm, any room left for the livestock? Sounds awfully crowded...>> The sand creates a bed from 3.5" - 5" all around. I've noticed, 24 hours later, that some life is starting to "sprout" on my live rock, i.e. some of the vegetative(?) matter has started to stand upright and it appears as though some small stem-like things are growing out of the rock. <<Ah yes...an interesting time>> I've read so many stories of hitch-hikers and all kinds of fascinating creatures living in the sand and rock. <<Indeed... Most quite good/nice to have...some, not so much>> However, I have not noticed any yet. <<Give it some time>> Typically, how long does it take for creatures to start appearing and seeding the sand? (i.e. worms, shrimps, small invertebrates, etc.) <<It has already begun I assure you...and will become more evident with time/as populations reproduce/increase...assuming you give these critters time to do so (leaving the tank 'fishless' for 6-12 months does wonders here)>> Second, is it possible to receive live rock and "live sand" (CaribSea stuff... I'm finding it incredibly difficult to find actual live sand that is able to be shipped to Canada, with the abundance of US suppliers, they are all not interested in shipping livestock across the border) that is NOT inhabited with all sorts of critters? <<Honestly mate, save your money... With live rock in the tank 'any' sand will soon become 'live'>> In this case, would a detritivore kit of some kind help increase the diversity? <<Very possibly>> Aaand, thirdly (Thanks, again), I've seen a few "overflow filters" for sale on various sites - I'm not sure how they get water out of the tank and how reliable they are. <<Mmm...are you referring to 'siphon' overflows? The name describes the function...>> I'm interested in setting up a refugium in the near future, and I can't drill any holes in the tank to create a bulkhead, and I also will only be able to place the refugium beneath the main tank, so - what options does that leave me for getting water back and forth? <<Ah, okay...a siphon overflow (two for redundancy/safety is preferable) to gravity feed (siphon) water to the refugium, and a small pump to return water to the display. It is very important to size the pump correctly so not to exceed the capacity of the overflow. Please start reading here and among the links in blue...much more information to be gained than can be passed here: http://www.wetwebmedia.com/plumbingmarart.htm >> I understand that running dual pumps for return and feed is asking for trouble, <<Indeed>> so I was looking at the overflow filters. It seems to me as though they just work using gravity, is that correct? <<Yes>> Does that mean every time the water fluctuates and breaks the "gravity flow" that I may risk overflowing the main tank with the return pump? <<It does...and reason enough to employ 'two' siphon overflow boxes and using a return pump with a flow rate sufficient for 'one'>> Thanks for all your knowledge and patience, things appear to be going really great with my tank so far! So exciting! --Adam <<Exciting for sure... EricR>> Sump-thing else? Plumb An Overflow 'Without' Drilling The Tank? -- 07/20/07 Eric (?) <<Tis I, mate>> So, I have been reading all sorts of stuff on the WWM site since last I e-mailed you with a question, ("Fowler to Reef" 1 & 2, "Sump-thing I would like to try"). <<Very good>> I also when out and bought CMA tonight (man my brain is about to explode!). <<Hee-hee! And so the learning progresses...>> So here is my next question, I am back to either a hang-on Sump/Refugium, (Is 5-gallons or so enough, with a small DSB and some Chaetomorpha and a protein skimmer in the first chamber, mostly for de-nitrification and maybe some small marine life), <<Is better than naught...>> or what is really evading me is, I keep looking, and everything is drill, drill, drill. <<Usually the 'best' way to go, yes>> I am not really interested in drilling my tank, I can't seem to find a good run down of how to set up an under-the-tank sump without drilling. <<Is quite simple my friend>> I have searched the FAQ's and can't seem to find anything, how can I go about this? (I know you guys seem to shy away from this set up, but...) <<The ubiquitous siphon overflow will serve here. You are correct that some authors shy away from these devices...some will even make hard-line statements re...but using a 'pair' of these devices for redundancy should one fail can work quite well (the trick is to maximize the flow rate as if you only had ONE overflow device installed)>> Any help would be appreciated. Thanks, ever more knowledgeable, Dan <<And 'thank you' for the interest/effort. EricR>> Re: Sump-thing else? Plumb An Overflow 'Without' Drilling The Tank? -- 07/20/07 Ok, one last question. Were can I find a good diagram or plans for a system like this, with flow rates and sizes, and pump requirements? <<Will take some reading/research on your part'¦some purposeful keyword searches on our site (and the Net in general) will yield much info'¦a good place to start re the plumbing is here (do follow/read among the links in blue): http://www.wetwebmedia.com/plumbingmarart.htm >> Thanks again Eric and WWM crew for all your help!! You guys are the best! <<Happy to assist. EricR>> New Marine Aquarium Set-Up, Overflow and Equipment 5/7/07 Hello again. <Hi.> My first saltwater tank was a 125g with a filtration system of live rock, sand, canister filters, two aqua c remora pro hang on backs, some power heads but no sump. <Sounds functional, though generally speaking I don't recommend the use of canister filters on marine systems.> I had it for about three years and then I moved to a new house, and could not bring the tank with me. I'm in the process of buying a new set up, and it will be either a 120g all-glass or a 180g all-glass. <Well you won't get me to talk you out of going bigger.> Do you think the 180g length of 6ft is more fish friendly than the 4ft length 120g? <As far as expanding your stocking options and increasing your surface area? Absolutely. The 180 will also be easier to aquascape.> Also, I will be getting the all-glass pre-drilled mega flo tank. <All-Glass make some quality designs and tanks'¦don't get me wrong. But I think the layout of the megaflow id perhaps one of the most illogically designed aquarium devices on the market. They intake water from the top, middle and bottom'¦..if you have a power outage and no way to back-up the power'¦or you don't have a ridiculously large sump'¦that mega-flow will be mega-trouble. http://www.all-glass.com/products/aquariums/index.html Besides that pre-drilled overflows like this one are usually a little small for my tastes, I believe the stock one is only able to handle 600 GPH. These are all things you should look into'¦> I'm not a good DIY type, so I have to purchase pretty much everything pre-fab. <I understand.> Do you think I'll be fine with the All glass setup of the pre drilled mega flow tank and the all glass megaflow sump 4, <Mmmm'¦as you can see from my above comments, the Megaflow is not my first or second choice in aquarium design.> with an in sump protein skimmer from aqua c, and a strong return pump. <Not too strong, with the megaflow your overflow may not be able to handle a large return pump.> Also, should I use a canister filter for extra carbon and mechanical filtering. <No, it will just be a detritus trap'¦you can run carbon in your sump.> I don't want to use power heads anymore, so I'm wondering how to get extra tank water movement? <Closed loop manifold system.> I've read of the SeaSwirls and the Tunze Turbelle Streams and I wonder if those can replace traditional powerheads? <These are useful water movement devices, but if your purpose in removing the powerheads is to have a cleaner tank appearance then you won't like the Tunze stream or the sea swirl as they occupy the same space if not more than a standard powerhead. Look into a closed loop system. Adam J.> Those Darn "Megaflow" Throughputs - 12/28/06 On 10/18/2006 EricR responded to a viewer question. <<Tis I, EricR, here yet again (still?)...>> During the response EricR made it very clear his displeasure of the AGA Megaflow. <<Indeed...sadly, the throughputs are too few and undersized>> I read his reasons and am a little worried because I was given a brand new 90 AGA for a gift. <<Congratulations on the gift...and as long as you recognize its limitations all will be fine>> This tank came with one "Megaflow" and I am wondering if there are modifications I can make to make it better? <<Mmm...will your orientation of this system allow throughputs through the back glass? Otherwise, about all you can do is employ a better drainpipe/standpipe such as a Durso or similar to help keep things quiet>> Obviously I can't drill bigger or more holes due to the tempered glass. <<Do check with the manufacturer re, but I believe only the 'bottoms' are tempered glass>> I can and will replace the bulkheads with better quality and lose the barbed fitting. Should I replace the drainpipe and return as well? <<Just as previously mentioned>> Any other thoughts are greatly appreciated. <<You'll only get about 300-400 gph through the single 1" bulkhead (before it becomes problematic) so do plan for additional flow "within" the tank>> Mike <<Regards, Eric Russell>> Hang-on-tank Prefilter/Overflow boxes 11/21/06 Hello, <Hi Michael, JustinN here with you tonight.> I have a 75 gallon display tank and would like to use my 38 gallon tank as a sump/refugium beside it. I am considering the Lifereef prefilter box to move water into the sump and a mag drive pump to return it to the display tank. I want to make sure that the Lifereef is the best option to avoid floods during a siphon break. I will also use two check valves on the return line to avoid a reverse siphon. Please let me know if this is a reliable product. Thank you. Michael <Well, Michael, I can't speak specifically towards this specific product, however, with overflow boxes, its a good idea to go with 2 overflows with flow control for redundancy. Assuming the output is adequate for your envisioned setup, I would imagine this product to be sufficient. Hope this helps! -JustinN> Overflows and returns 11/16/06 First off, I want to thank you for all your help. This is truly a great website to help hobbyists like me. I am trying to plumb a new tank and had a question about combining lines. My tank has 2 1" returns and 2 1.5" drains. I wanted to know if I can T the 2 returns with a 1.5" PVC pipe <Can> and T the 2 drains into a 1.5" PVC pipe <This I would not do... better by far to run both 1 1/2" lines down independently to the sump> so that I have one PVC pipe draining into my sump and one return pump. I know you usually want to T 2 smaller sizes into a larger sized PVC pipe but since my returns are only 1" I wanted to know if I could T the 2 1.5" drains with a 1.5" PVC. <I would not... too much likelihood of restricting the flow to too large a degree. Bob Fenner> Safety overflows 11/10/06 I have a 90-gallon reef tank with a 29-gallon sump/refugium mounted in the stand below. The tank has a utility room behind it where I house the lighting ballasts, Tunze electronics, and RODI auto-top-off system. <Nice> The top-off system consists of 20-gallon Rubbermaid Brute that is filled by a wall mounted Spectra-Pure RODI filter. The RODI filter is hard-plumbed, and controlled by a float valve in the reservoir. Then, I have a JBJ ATO monitor with a small powerhead in the reservoir that pumps RODI water into the sump when the water level in the sump drops. <Sounds good thus far> In case the float valve on the RODI reservoir fails, I've installed an emergency overflow tube (mounted to a floor drain) 1" below the top rim of the RODI reservoir. I'd like to do the same with the sump/refugium, in case the ATO monitor ever fails. I want to drill a hole about 1" below the top rim of the sump/refugium, but this is a glass tank, and I would probably have to empty it to do so. <Yes... though could mount/Silicone in a electro-magnetic switch sensor to the area above the water line with water present likely> I'm looking for alternative methods to install a safety overflow here. Any suggestions? Or is there a way to drill a glass sump without emptying it? <The latter? Not practically... But as stated, a mounting bracket for such a switching mechanism could be adhered... Bob Fenner> Thank you, Steve Acrylic aquarium 11/6/06 Hi, I'm entirely new to this hobby, (lifestyle). I've been reading and reading and reading. <Good> I'm interested in getting an acrylic tank, 48x18x20. I'm not going to get it reef ready, but I will be drilling the back of the tank for a Calfo overflow. I'm getting different opinions on whether I can attach an acrylic interior overflow box to the back of my tank. <Mmm, you can... but if you're at all unsure of your skills at such a fashioning, attachment, I encourage you to secure this to the inside> If so what do you recommend as a good solvent to do so. <Weldon... number... 40> Will I have to worry about any bowing that would break the integrity of the attachment. <Mmm, no... not if the structure/weir is cut to be flush/parallel with the wall... and solvented all the way around... perhaps a practice go outside the tank...> Thanks for all your help. You have the best and most informative site that I've found. Joe <Thank you Joe, and welcome to our ever-wonderful hobby. Bob Fenner> Re: New Predator Tank Stocking, actually plumbing/overflow Advice 10/29/06 Thanks for all your advice Bob, where can I send your Christmas present?? <Mmm, the Red Cross?> On the comments about my 'emergency drain' on my smaller tank. I think perhaps you misread what I was getting at. I already have a corner overflow with a drain out the bottom of my tank to my sump. My water level in my overflow remains at approximately 3" during normal operation. I am thinking of putting my emergency drain within the overflow compartment perhaps about 5" from the bottom of the overflow on the back or side of the glass. If there was a power failure... Simply my pump would not continue to fill my tank and tank water would lower to the level of my overflow draining out the bottom drain. It wouldn't have any effect on the emergency bulkhead drain. The only instance in which the emergency bulkhead would come into play would be if the strainer on the primary bulkhead drain would become clogged thus allowing the overflow water to rise beyond 5" and then the water would have the same drainage capacity as my primary overflow. <Ah, I see now> Correct? Two 1 1/4" drains on a 90 gallon tank should be sufficient since my primary drain already easily handles the tank flow? <Yes> On my 200gallon tank, which is becoming the predator tank I described below, I only have the one drain and my pump that would be rated at 1,775gph overflows the overflow and raises the tank water and runs my sump dry. Thank god I did a trial run on freshwater and nothing else is in the tank. I've emptied my freshwater and someone's coming out on Friday to drill a second 1 1/2" drain on this tank. <I'd have multiple... oh, I see this addressed below> I'm wondering though, If my existing drain is not sufficient to handle the water flow, adding a second drain would handle the water inflow... But if either one of them becomes clogged... My sump will run dry. I was so paranoid of my 200 gallon tank overflowing and flooding my developed basement... I made it virtually impossible to overflow my tank... Pretty much in every instance my sump will run dry long before my tank overflows. Is it better to add as second hole within the existing overflow several inches up the back of it? <I'd keep at the same level.> Should I possibly add another overflow box within the tank and add a third drain? i.e. one overflow contains two drains and the other overflow contains one drain? <Yes> 3 drains total and obviously the highest positioned drain serving as my emergency drain? Dave <A good plan. BobF> Marine Plumbing, drains/overflows... 10/24/06 Hey there, I mailed you quite a while with a question on waterproofing a homemade sump. Thanks for the advice you gave me, it worked out well if you remember.. I was thinking about getting my sump rhino lined.. yes it sounds dumb now). <Actually... polyethylene... just expensive in HI> Anyway, I was hopping you would be able to give me a little more of that great advice. I did lots of searching on your site but its a little hard to find the right search words.. all the wrong topics keep coming up. So, the problem... I currently have a 240gal 24x24x96 tank. My drain lines cannot handle the amount of water my pump is putting into the tank. <... not unusual a situation> I have two 1.5" drains with Durso style standpipes in the overflow boxes. The pump is the SUPER quiet sequence dart. The pump is pushing water up through about 6 feet of head, which according to the pumps flow charts should be giving me somewhere near 2400gph. Now a 1.5" drain should give me 60gpm right ? <Mmm, no... not in the real world> (I got that on your site with another person you helped out) Then two 1.5" drains should give me 120 gpm or 7200gph. Now considering that my pump is pumping out at around 2400gph I know I have a design flaw. Even if the pump had no head its max output is rated at 3600 gph which is still way under what my overflows should be able to do. So here it goes, ill start with the left side overflow and run you down the pipes. The standpipes drains about 1" below the waterline. The water then falls down about 20" to the bulkhead. Under the tank I have a union placed right up against the bottom of the bulkhead. After the union the water falls 6" down to a 45elbow then travels 6" horizontally to another 45elbow, through a bulkhead with another 45elbow sending the water falling 15" or so to a submerged output. I'm going to be putting a micron bag on this line. The submerging keeps it nice and quiet. <Yes> The overflow on the right is identical until you get past the union on the underside of the tank. After that union the water drops about 6" to a 45elbow then about 8" horizontally to another 45elbow sending it (still horizontally) to a tee. The tee has unions on both side and 45elbows going into two bulkheads for the two separate chambers of my wet/dry. To do something about the noise and the velocity of water tearing the blue filter pad to shreds) I have two small bowls that sit on the wet/dries blue filter, the bulkheads output are submerged in these bowls about 2". <Good technique> So to sum it up, the left side has two bulkheads, one union and three 45elbows to a submerged output. The right side has 3 bulkheads( two are on separate lines after the tee) four 45elbows ( two on separate lines after the tee) three unions, and one tee, going into a submerged output ( really didn't mean for this to start sounding like a riddle hehe). All the plumbing is in 1.5" and I though that maybe the air holes at the top of the standpipes weren't big enough. <Mmmm...> So I took the tops off and let the noise all out. It still nearly overflowed my tank. Could it be that my standpipes need more head pressure to deliver more flow? <No/pe> should I try to lower them? <Won't help much... not appreciably> Or could it be that having both my lines submerged has left the air nowhere to go but up making it hard for water to go down? I don't know but, Am hopping you do. <No more hopping/hoping...> The last time you gave me advice you mentioned you have a home on the big island. <Yes, in Holualoa... on the 180... just down from K. Komo market> I hope you weren't there for the quake and your house is ok. anyway... hoping for some good advice over on Oahu.. take care <Thank you... What you "really" need are more and or larger overflows... two, make that three 2" inside diameter... the rest of the plumbing configuration detailed is fine... not contributing to your lack of flow potential... Either re-drilling the tank and re-doing the plumbing or changing the delivered water to the main tank (a smaller pump, diverting part of the flow... a restriction valve...) are your easy alternatives. A hui ho! Bob Fenner in Thailand> Mahalo nui loa -Chris R2: Hard Plumbing...Soft Plumbing...Pump Intakes...Bulkheads - 10/20/06 Hi Eric, <<Hello Ken>> Thanks again. <<Always welcome>> Few more questions if it is ok? <<Sure>> What do you suggest that I use from my 1" bulkhead return to my sump in terms of piping or tubing. The bulkhead is pretty much right on top of the sump. Do I use PVC straight down, or angle it somewhat, or tubing. <<I would use rigid PVC straight in to the sump with a 45-degree ell on the end positioned just below the water's surface. The ell helps to clear bubbles so they aren't trying to go back up the pipe/creating resistance like a "straight-in shot" would>> I am asking the question based on what may be the quietest with the standpipe in the tank. <<Understood>> I thought I read somewhere that straight down was not the best option. <<Thus the reason for the ell/for placing the output below the surface>> When I fill the tank with water the first time and run the system to check for leaks: A) Can I keep this water and go with it or do I need to change it due to new tank, tubing, piping, etc. <<Should be fine to "keep">> I was wondering if there is anything that could be bad for the live rock or livestock once I stock the tank? <<Mmm...be sure to follow proper cycling protocol for newly established systems>> B) How long can I run the system without lighting (except room lighting) without putting anything into the tank? <<Theoretically speaking...indefinitely...but I like to put light on my rock while curing/cycling the tank, and let the natural algae progression take its course>> I was wondering if I would get algae if I ran it for a couple of three days with nothing in it, as I am not sure what day I am getting my rock. <<No matter...will happen eventually>> I used to use Reef Crystals many years ago when I had a reef tank. Is this still good? <<Will be fine>> My tank is 90 gallons with a Marine Technical Concepts HSA-1000 skimmer, and their Pro-Cal calcium reactor, Maristar HQI (2x250 watts) and T5 (2x54 watts), and two Tunze Turbelle Stream 6000's with controller. How many pounds of live rock do I need? <<I like to go with a "bit less" than most would suggest for reasons of aesthetics/giving the organisms room to move around/grow. I would start with about 60lbs of a premium rock and make adjustments as need from there>> Is it 1.5 lbs per gallon or less than that? <<A useless measurement in my opinion...to many variables (weight of the rock, type system/ancillary equipment employed, species/type animals, etc.)>> It is supposed to be Fiji. <<Should be fine...though some regard this rock as "bargain" rock>> It is from LFS and it is as cured as you are going to see from a store. <<I would still expect/allow for this in your tank...albeit likely diminished>> I will also use the packaged live sand too (for aesthetics mostly), maybe about 3/4" or so (depth ok?). <<Yes>> Is the Carib-Sea live sand or the Nature's Ocean a better choice? <<Waste of money in my opinion...use dry aragonite and let the rock seed the sand>> Is there a certain grain size that I should be using, and do I have to put this under the rock or can I put the rock in the tank first, and then the sand up to it? <<A mix of grades from sugar-size to 2mm is fine...and yes, for stability placing the rock on the tank bottom and then adding the sand works fine>> I think I used up my quota of questions. Thank you so much for your help. <<No worries mate...we're here to help>> Regards, Ken <<Be chatting. Eric Russell>> Hard Plumbing... Soft Plumbing... Pump Intakes... Bulkheads - 10/19/06 Hi Eric, <<Hello Ken>> Thanks for the response. <<Quite welcome>> In between I sent you my email and saw your response I had discovered the world of flexible PVC. <<Ah...>> I used this with PVC glue. <<Yep>> I used 3/4" and 1" for my two pumps. I did a smooth curve (not a loop). <<Excellent>> It probably took 15" -18" to make the smooth curve. I would imagine that this should be ok? <<Will be fine>> Does this stuff definitely hold? <<If you installed it correctly, yes...is as strong or stronger than schedule-40 PVC hard pipe>> I also put a union on the suction side. Is this ok? <<Yes...and a good idea to facilitate maintenance of the pump>> I figure that in case I ever have to take the pump out this would be the simplest. <<Indeed>> I would imagine that I should put a ball valve somewhere on the discharge side. What do you think? <<I agree, but not a ball-valve...instead install a "gate-valve" as this will give you a much finer control of the flow. You should also consider placing a union between the pump-discharge and the gate-valve for the same reason you placed one on the intake side of the pump>> I know some people would say put a valve on both ends of the pump due to sump drainage if the pump is removed but I could always take some PVC pipe and a 90 degree elbow and some more pipe and put it higher than the water line. <<If this is your "return pump" it should not be an issue as you should have the sump plumbed in such a way as to hold all the transient water when the pump is off. Thus, once you turn off the pump and allow the tank to drain down, water from the drain line/pump intake line wouldn't be a problem>> I am trying to keep as many "add-ons" out of my plumbing. <<Always good>> Of course I need to lose some gph anyway since the pump is rated at 790 GPH at 5-feet of head and the tank can only handle 600 GPH. <<No worries, the gate-valve will allow any final adjustment if necessary...and I think you will find that 600 GPH will be too much for the single 1" drain to handle easily>> One more question about the standpipe with the Mega Flow. <<Okay>> Is this noisy? <<Usually, yes...you will probably want to consider a modification. Do a Google search re "Durso Standpipe" or "Stockman Standpipe"...I think both offer "kits" for these now>> I was curious why I read about people switching to the Durso standpipe. Do you have any ideas on this? <<Indeed...most hobbyists find the "stock" standpipes supplied by the tank manufacturers to be about as inadequate as the throughputs themselves>> Also, is there a trick to "tuning" either of these standpipes? <<Should be listed on the respective websites, but generally, aspirating the drains sometimes proves helpful>> Oh yea, and I did replace the two bulkheads that came with the tank. <<Ah, very good>> Thanks a lot. Regards, Ken <<Pleased to share, EricR>> Check valves and Overflow - 10/15/06 Hi there, <Hi.> I found your site after doing an exhaustive search for alternatives to Check-valves. I have a 250 gallon tank with a classic wet-dry sump design with overflow boxes on each corner. The problem is my return lines. I have two ½" returns on the very bottom of the tank so there are no stand pipes to break the siphon. <You should consider building some. This is a very weak point in your setup. Try to visualize 250g of water on your floor.> Additionally, I have a ½" return that has a standpipe that runs up the left overflow box and then goes back down to 2 bulkheads that return the water to the tank, this one has a small tube that is supposed to break the siphon. The same thing exists on the right side except it does not go back down to the bulk-heads through the return box its just a single ½" pipe that has t connectors to the two bulkheads and just ends at the top so there is no anti-siphon pipe at the top. My question is: Is there an alternative to completely changing the way water is returned to the tank or using un-dependable swing check-valves. <If there is, I'm not sure what it would be... check valves are about as reliable as they need to be but need to be inspected/tested at regular intervals.> I guess I could do check valves but will have to clean them every month and there is still the possibility they won't work. <If you clean them at this interval, then they will work for years. I use the dual-union style so that they are easy to take out of service for maintenance.> Any thoughts would be welcomed. Thanks, Jason B. <Cheers, J -- > Micro-Bubbles/Drain Line Plumbing - 10/14/06 I have a 215G Oceanic Reef-Ready that came as is from the factory. I thought I did my homework and then some when ordering this tank, but I have since learned that the drains are inadequate for this size tank. <<A common enough opinion/fact that you'd think the manufacturer would eventually "get it">> Re-drilling this thing really is not an option at this point so I need to make best with the situation that I have. <<Can be done, yes>> I'm running 2 Mag-Drive 7's for my returns, I'm figuring that I'm pushing about 700-800gph combined with the 2 pumps after figuring in head pressure. <<This should pretty much "max out" the 1" drains>> I have two Vortec pumps to provide additional circulation within the aquarium. <<Excellent>> The two 1" drains are handling this with no real noise issues. <<Good...often this is not the case>> The problem I'm having is with micro-bubbles, I'm not sure if this would be related at all to the inadequate drains. <<Could be/probably is...nowhere for the entrained air to go...>> I'm doing a container with a container sump system using Rubbermaid Totes. I figured that my problem was the result of not enough baffling, but I have since read the opinion of one of your crew members that micro-bubbles are not the result of the water returning from the drain, instead they are only formed in pressurized situations. <<Hmm...>> Is this fact, or just his opinion? <<I have no wish to second-guess others of the Crew (especially without knowing the reasoning), but I suspect both (opinion based on some fact). But that said, I don't agree that micro-bubbles would only be present in "pressurized situations." As with the case of venturi-style skimmers, the bubbles can be the result of trapped air and water turbulence...in "my" opinion. Maybe it comes down to the individual interpretations for "micro-bubbles," but I have witnessed some very fine bubbles emitting from drain lines over the years>> I poured a glass of water in my tank and saw large bubbles near the surface and very fine bubbles deeper in the tank, similar to the micro-bubbles that I have. <<Indeed...much the same as what is happening in your drain lines>> If it is true then my problem must lie within my plumbing work or the pumps themselves. <<Bingo!>> I don't want to reconfigure my baffling setup if I'm not getting rid of the source. <<Hmm...well...supposedly the "baffling" should handle any bubble issues (is why it is there), but excessive quantities of very small bubbles can be very difficult to "baffle out." I agree with your stance to attach the source of the bubbles>> I did the Vaseline test on all plumbing connections and that didn't seem to help. <<Do be sure to clean the joints of any residual Vaseline to preclude possible deterioration of the plastic from the petroleum elements (Bob "cringes" at the use of this product). It's likely the problem stems from the fact you have the drains pretty much at their maximum potential. "Noise" isn't the only problem associated with overloaded drains. I think your problem is entrained air due to the amount of water you're pushing through these 1" drains...aspirating the drains may provide relief. This involves inserting small-diameter tubing at the highest point in the line to allow trapped air a route of escape. The exact diameter and length of insertion requires a bit of experimentation>> I have two 30G totes as my main sumps, linked together through bulkheads. One was going to be a refugium. I'm now thinking that perhaps I should now use the refugium tote to provide additional room for dealing with the micro-bubbles so I can have more containers and hence more baffling. <<Mmm, I like the idea of the refugium. I would look to aspirating the drain lines...you could also try using just one return pump to reduce flow in the drains (would still be plenty of flow through the sump/refugium in my opinion>> I also seem to have what appears to be a bunch of fine particles in my saltwater, like dust in the air, only seen when turning the lights off and shining a light through the tank from one side and viewing from another. <<Hmm, do you have a fine substrate? Bioturbators? I wouldn't be concerned>> I'm sure after all the work I have been doing in an attempt to rid myself of the bubbles I have introduced a good bit of dust into the tank. The tank was filled with purified water, so the source is not my source water. But I'm not sure if this can be related in anyway to micro-bubble formation, or if everyone who did the same thing would see it in their tanks as well. Can you tell me what would be the best way in using a sump system such as this to filter out these fine particles? <<Some folks use filter socks on their returns. I am not a fan of these as they trap detritus (obviously) and require constant maintenance/attention to keep them clean/become a source of decaying organics. Personally, I wouldn't bother/worry about some particulates in the water>> I have already drained this tank once, and it would take a lot to have to do so again. <<I see no reason to drain the tank>> Please let me know any input you can provide for my situation. <<Have done so...>> I hope this post is coherent; I have been up late trying to work this thing out. but I'm determined to do so. <<No doubt you will>> Thanks, Kevin <<Regards, EricR>> Plumbing/Overflow And Pump Size 10/6/06 Hello, <Hello Wayne> I am setting up a 35 gallon marine tank with a 20g sump. My question is what size overflow should I use since the tank is not drilled. I was planning on connecting a 1/10 hp chiller to the sump with the return to the main tank. The chiller recommends a flow of 200-300 gph with 5/8in tube fittings. Would a CS50 overflow box be o.k. or should I go with the CS90. Also, what pump flow would you recommend. <First, I would recommend nothing lower than a 400gph pump. You will lose some gph through the chiller and the return line. A flow control can always be put on the pump outlet to regulate flow. The CS50 is only rated at 300gph flow rate, so I'd go with the CS90. For additional info on subject, read here and linked files above. http://www.wetwebmedia.com/plumbingmarart.htm> Thanks in advance. <You're welcome. James (Salty Dog)> Wayne Overflow Design/Bulkhead Size 10/3/06 Hello. <<Howdy>> I have a 135 gallon (6-foot) glass aquarium that is not drilled that I would like to set up as a reef. <<Ok>> After doing some reading on your site I'm leaning toward having the tank drilled and building some sort of gravity fed overflow, since siphon "CPR style" overflows seem to eventually fail. <<Indeed...though I must admit I ran/used siphon overflows for more than a decade with but a few "failures" in that time... and nothing catastrophic as I always allowed for transient water volume in both sump and tank. There are measures to take to increase reliability...and if using siphon overflows it is always a good idea to use "two". But if you can drill this tank then I do suggest that is the way to go>> I like the idea of drilling the holes on the back wall near the top of the tank (2-3" from the top would be ok??) in case a bulkhead leaks not all 135 gallons end up on the floor. <<Mmm, yes...is my preference over drilling the bottom as well. As for the holes, the edge of the drilled hole should be located at least the diameter of the hole away from any edge (top or side). For example...a 1 1/2" bulkhead requires a 2 3/8" hole, thus, the hole should be located so it edges are no closed than 2 3/8" to any tank edge. This is a bit conservative for some folks, but is a good rule of thumb for maintaining/maximizing strength/integrity of the glass panels>> I was planning on 2 X 1 1/2" (inside diameter) bulkheads, would this be sufficient for approximately 1,000gph flow from the sump pump? <<Should be, yes...and why not drill an "extra" bulkhead while you're at it? This can be capped-off for now but will be available should you decide to add a closed-loop, etc.>> Is it necessary to attach the internal overflow boxes around the bulkheads or could I just use some sort of basket shaped screen to keep critters from going through the hole? The screen idea just seems much easier. <<Indeed it is. I have my tank drilled through the end walls (is an in-wall installation viewable from front and back). I used "slip" bulkheads and modified 1 1/2" ABS 90-degree ells (notched edge of top opening) fitted with a short length of PVC pipe and inserted in to the bulkheads to create "mini" overflows. Another method would be to simply insert bulkhead screens and design the drain plumbing coming from the bulkhead to the sump with a small "hump" just off the bulkhead to control/raise the water height in the tank above that of the bulkhead. (Have I lost ya yet?)>> If I did decide to build an overflow box do I have to use glass since nothing seems to permanently bind glass and acrylic? <<Silicone will usually bind acrylic sufficiently for in-tank overflows>> Is there anything else I could build it out of that would bind to the glass aquarium that is easy to cut and work with? <<Give the acrylic/silicone a try...many overflows in manufactured tanks these days are plastic>> Ok, one last question. All the overflow boxes I have seen in stores always go from the top of the tank to the very bottom. <<Generally because these tanks are bottom-drilled>> I'm assuming this is because they are made for tanks that are drilled at the bottom. <<Ah, yes!>> Since I want to drill my tank near the top, can I build a much shorter overflow box, say 5-6 inches tall? <<Indeed you can, though without support from resting on the bottom of the tank, glass might be a better choice over acrylic for the better "bond" with the silicone>> What would you recommend as the minimum dimensions of each overflow box to accommodate a 1 1/2" (inside diameter) bulkhead? <<Hmm, I'd try 5" high x 4" deep x the entire length of the back wall...but do a Google search on our site/the NET re "horizontal overflow" to get other perspectives on this>> Thank you for all your help, Jon <<Happy to assist. Regards, EricR>> Re: Overflow Design/Bulkhead Size -- 10/03/06 Eric, <<Jon>> Hey, thanks for all your help. <<My pleasure>> I really like your "mini" overflow idea. <<Works for me <grin> >> Is it very loud? <<Nope>> I read that many people install the "Durso" standpipes to quiet the water. <<Tis is true but there are others ways to mitigate noise...reduce flow or increase the number of throughputs for same...aspirate the drain lines...>> In your "mini" overflow design, I don't think that is possible, is it? <<Would/is not possible, no>> Is that a problem? <<Not in my experience/with my configuration>> Would two 1 ½-inch diameter elbows acting as the mini overflows be sufficient for a 135 gallon (1000 gph flow)? <<Can't say for sure without giving it a try but yes, likely so if you can aspirate the lines well enough to prevent surging/sucking. But honestly, you don't need to push this much water through your sump (you will have other means of providing water movement in the tank, yes?). You can go ahead and use a pump rated at this capacity, but do install a gate-valve on the output side of the pump to allow you to reduce flow if necessary to quiet the overflows/the sound of the water rushing in to the sump>> Are they screened off in any way of just have notches cut into them? <<Just notches...and positioned high enough under the lip of the tank (acrylic) to prevent fish/astrea snails from entering. If this is a concern, you can try rolling a bit of plastic 'gutter guard' and inserting this in the ell (will need to be checked/cleaned periodically of any accumulation to prevent loss of flow)>> Are they glued in or just pushed on? <<A slip/friction fit>> Would a thread X thread bulkhead work in this case too? <<If you have enough clearance above the bulkhead to 'spin' the elbow, yes>> I'd want to be able to remove the elbow in case it needed cleaning or to be replaced, and would rather have it screw on rather than just push in, for safety's sake. <<The slip fit has not been an problem in my experience, just be sure not to wedge it in so tight you can't get it back out>> The bulkhead screen idea seems good too. Let me make sure I understand it though. <<Alrighty>> Inside the aquarium would only be the screen, about 3 inches underwater. <<Correct>> On the outside you would simply raise the pipe coming from the bulkhead a few inches up to the point where you want the level in the tank to be, by using a few elbows, right? <<In theory, yes. I have not tried this myself>> Would it be a big deal that you wouldn't be skimming any water off the surface, rather just below? <<This method doesn't allow for removal of surface film>> Ok, I'll leave you alone now. <<Not a problem my friend>> Thanks again, Jon <<A pleasure to share. Eric Russell>> Re2: Overflow Design/Bulkhead Size -- 10/03/06 Eric, <<Hiya Jon!>> Hey, just wanted to say thanks again for all your help. <<Truly my pleasure>> I think you just solved my problem. Jon <<Ahh...is redeeming to hear (read). Good luck with your venture my friend, EricR>> Drain Flow Rate 9/27/06 Howdy guys and gals! Thanks very much for all the help so far! <Hello Garth> My new tank has a corner built in overflow box with a 50mm (2") drain hole drilled in the bottom. with two 32mm (1 1/2") pump pressure returns drilled holes. The drain return (to the sump) has a bulkhead fitting and due to that it ends up with 40mm (1 1/2") ID PVC pipe and a Durso submerged inlet (all 40mm - 1 1/2") The pump pressure returns are also bulkhead fittings and end up as a 20mm (3/4") ID after the bulkhead fittings. But with the use of an adaptor I end up with 1" ID for the two pump pressure returns. I plan on running two Oceanrunner OR2500 rated at 2500l/h each (625gph). <The OR2500 is rated at 650gph.> There will be approximately 4ft head on these two pumps. So I will have a total of 5000l/h (1250 gph). <With a four foot head on each pump, you will not have 1250gph, but somewhere around 700-750 gph which is well within the drain's capability.> I would just like to know if my overflow will handle this flow rate. Thanks for your kind words of wisdom. <James (Salty Dog)> All the best and take care. Garth Re: Overflow And Pump Size 9/27/06 Hello again James, Thank you for the quick response. <You're welcome.> In regards to connecting the sterilizer and chiller on the same pump, I had posed this question earlier on WWM. The chiller I have has a flow rate of 250-350 gph and the sterilizer a 100-200gph flow rate. EricR (who responded quickly as well) said that I should use separate pumps for each since trying to adjust proper flow would be difficult. Do you still think I should connect them all together, if not, do you still recommend a return pump of 500gph. <You gave no flow rates on the equipment in your query to me, so I assumed they were sized for somewhere in the 300-350gph range.> (I am adding EricR's response so you can see it in total.) <Should have replied with Eric's suggestions, since he answered your original query and was aware of the equipment being used. Much better for the same person to do the follow-up.> I value everyone's opinion at WWM so any suggestion on which method to use will be greatly appreciated. I want to try and avoid the whole "trial and error" process as much as possible. <Now knowing the equipment you have, I would go with Eric's suggestion on the UV, and, if it were me, I'd go with a pump in the 400gph range and pump water from the sump, into the chiller, and back to the tank. With the head pressure loss, you will be around 275-325 gph on the return, well within range of the chiller recommendation. Additional flow rates can be increased in the tank by use of a powerhead. This will give you flow in the tank from more than one direction. Based on Eric and myself's suggestions, you will have to decide which method will work best in your situation.> Once again thank you in advance. <James (Salty Dog)> Wayne Overflow And Pump Size 9/26/06 Hello, <Hello Wayne> I am planning on upgrading my 15 gallon tank to a 35g with a 20g sump. My tank is not drilled so I'll have to use an overflow to bring water to the sump. What type of overflow do you recommend (gph flow) for this size of tank and what gph pump do you suggest. I am thinking about using a SCWD wavemaker connected from the return pump. I will be connecting a 9w sterilizer and a 1/10 chiller into the sump as well. Each will have its own pump because of the differing water flow. The chiller and sterilizer will be pumped from the pumps in the sump back into the sump ( if that makes any sense). Only the return pump will be returning water back to the tank. Is this method of circulation o.k. or should I try it another way. I will have a skimmer, but due to the limited space in the sump it will have to be hung on the back of the tank. Keep up the good work. <Wayne, not a very good way to do is. First off, the chiller will be turning on/off constantly as it will be looking at water already cooled for the most part. Same goes for the UV, you want it to look at as much tank water as possible. I'd select at least a 500gph pump and connect everything in-line. Pump through the chiller, then the UV, then back to tank. Multiple pumps in a small system will use more energy and create more heat, and the chiller will run more often, adding to the bill. Overflows should be selected so that it's total flow rate is close to the pumps capability. Oversized overflows create problems in this regard, often leading to constantly removing air trapped in the "U" tube due to the slower flow rate through the tube. I'd probably go with the CPR CS-90 overflow, which will give you a maximum of 600gph flow rate. This still puts you in between a rock and a hard spot. The CPR CS-50 is a little shy on flow rate for your tank (300 gph), and the CS-90 is a little high at 600gph. Your other option is to have the tank drilled, which would be the way I'd go. It would still be cheaper than buying the overflow and eliminate the hassles of such, and less clutter in/on the tank. The 20 gallon sump would still be fine in this system.> Thanks in advance. <You're welcome. James (Salty Dog)> Wayne 120 gallon tank drilling pipe setup 9/16/06 I currently have a 75 gallon reef aquarium. I bought a 120 gallon 6 foot long X 18 d X 21 tall aquarium that I want to have drilled for sump X 2 and refugium X 1. If you think this is possible. <Mmm... better to go with two good-sized overflows and use "Tees" and valves for water distribution below> I was going to make a total of six holes. Two holes would be for outtake and return from under the tank wet/dry filter (it only has one intake hose), two holes for outtake and return for under the tank sump holding rock, sand, and mangroves (any other suggestions for what should be in this, such as mud, etc?) <... posted on WWM. Read here: http://www.wetwebmedia.com/marsetupindex2.htm> and two holes for outtake and return for above tank refugium containing rock, copepods, amphipods, Chaetomorpha, etc. Where should I have these holes drilled and how would you hook up the system (which hole goes to and returns each system. <Also posted> I saw you mention something about cages instead of an internal overflow, where can I get cages? <Such thread on intake screens are available from online and not outfits like MarineDepot.com and All Seas if you're a dealer> Do you have pictures of a tank with cages instead of an internal overflow? I want to avoid using power heads as well, Will the two returns from the sump and filter be enough circulation? Any suggestions you can give me that might make this better would be appreciated. Thanks Stephanie <Keep reading my young friend... you're not quite "there." Bob Fenner> Re: 120 gallon tank drilling pipe setup 9/17/06 Can you send me the passage on the slender horizontal overflow, does anyone make these for purchase? <... what? Please... keep reading. BobF> Overflow box problems - 09/03/06 Help I have a 75 gallon vertical tank, octagon shaped. I have a wet dry filtration system with a typical overflow box. Every time I stick my hand into the tank to try and clean or feed my animals the overflow box stops working. <Too touchy for my comfort...> I know my hand and arm displace water but it is very frustrating to go through to process of restarting the wet dry circulation every time I put my arm in the tank. Any recommendations? Frustrated. <Yes... I'd add another overflow... Please read here: http://www.wetwebmedia.com/overfloboxfaqs.htm and the linked files above. Bob Fenner> SW plumbing, overflows mostly - 09/01/06 I am in the process of setting up a new aquarium and wanted to run the set up by the great team at WWM to see if there are any clear issues. < 20+ heads are better than one! > My new tank should be 170 gallons measuring 60"x25"x25". It will have a 40" horizontal weir overflow with 4 1" bulkheads. There will be 2 1" bulkheads for the return. I am looking to set up a small sump tank under the cabinet to take in all the overflows and run the skimmer. The water will then flow down to my basement using a 2" PVC < You may want to consider multiple 2" lines. > <<And this size through-puts/bulkheads... the one-inchers won't do here. RMF>> to my main sump which will be larger and contain a refugium. I will then use an Iwaki pump to return the water back up. < A MD-100RLT, I presume! Great pumps. > I wanted to keep the skimmer on the first floor because it's more convenient to clean but keep the rest in the basement because of easy access to water. < Sounds great! The only concern I would have is the ability for the single 2" line to handle the flow from four 1" bulkheads. Simply doubling up should suffice. Good luck! RichardB > <<Mmm, what's that formula for the surface area of a circle? pi R squared.... do the math. Surprised? RMF>> A Plethora of Plumbing Questions - 08/31/06 Hello, <<Howdy>> I have a few questions regarding plumbing my 120 tank to my sump. <<Alrighty>> I am setting this up as a FOWLR now, but planning for the flow for a full reef later. <<Mmm, no reason your FOWLR shouldn't have this benefit as well>> I have been reading WWM daily to get a good idea of how to plan things, I just wanted to run this info past you to see if all is good. <<Ok...let's see what you've got>> I have a 120(48x24x24)gal tank, it will be built into the wall with a utility room in the rear, so space is not a big issue. <<Cool!>> I am going to have it drilled locally at a glass shop. I am going to use two 1-1/4" bulkheads for drill-bit size reasons. I have 2 bulkheads to be installed that are 1-1/4"ID. These will both feed the sump. I plan on having them drilled aprox 5" from center to the top of the tank (in the corners), and in the tank, use two 1-1/4" 90's with a threaded strainer to skim the top. <<Ah, yes...this is very similar to my drain/overflow configuration>> After coming out of the back of the tank, I will use a reducer to go to 1-1/2" pipe. I know that it will only flow the equivalent of the 1-1/4" flow bulkhead, but the 1-1/2" pipe is more readily available <<Indeed>> -What is the flow of each 1-1/4"? <<There are many things that can "revise" what is essentially a laboratory environment/best possible scenario flow calculation... The flow calculator on Reef Central says you can flow 920 gph through a 1.25" bulkhead drain...experience has taught me that reality is about HALF the calculated rate. You can squeeze out more, but for reasons of complexity/noise/hassle you will be better off adding more throughputs if you need/desire more flow than this>> From the reducer it will go into a T-wye for better flow movement, and will run above the tank a few inches to be topped off with a cap on each Over-Flow that will be drilled at the top to allow for air to vent. <<You'll find inserting a length of tubing through the vent-hole in to the pipe a short ways will be more efficient than the vent-hole alone>> Then running down via a 1-1/2" pipe it will go into the sump via a 1 1/4" reducer. <<...?>> My sump lid is already drilled for the 1 1/4". <<Ah!...I see now>> Will this second size change hurt flow at all? <<Will be a "slight" hindrance/increase in friction as the water navigates the "bump in the road">> I plan on having 2 unions installed and 2 gate valves. <<Unions are fine, but I wouldn't put valves on the drain lines...too much flow restriction and chance for blockage>> I will also allow for an additional T somewhere in there for convenient water changes and maybe feeding a fuge later. <<Good planning>> OK, with this said, here are a few of my questions: -What do you think my total flow will be with the 2 1-1/4" bulkheads? <<As outlined previously...about 900 gph or so, before things start to become problematic>> -Do I need to go to 1-1/2" bulkheads? <<If you want more flow than this, yes. But I see no reason to push more water than this through your sump. You may want to consider additional throughputs for a closed-loop for more water movement within the display tank>> -Is converting to the 1-1/2" in the middle causing any flow issues? <<No>> -Where in here should I put my UV? <<Mmm...should not be plumbed in-line with the drain>> Should it just get its feed from the sump and use a pump or add another T + reducer to use gravity to feed the flow with a gate valve? <<Best configured/flow regulated through a dedicated pump>> -Will the UV just return to the sump? <<Up to you...can be plumbed to simply recirculate in the sump if you wish...or can be plumbed from the sump to the display>> It's a 15-watt (I know it's a little small but I'm using it for now) will it do any good? <<Again, up to you...its efficiency will depend greatly on how diligent you are about keeping the lamp sleeve clean...but yes, will likely provide "some" benefit, though these units are more trouble than they're worth in many cases...in my humble opinion>> -I have an in sump skimmer, should be OK..?? <<No idea/not enough info, but if it came with the sump I have doubts as to its quality/efficiency>> -Will running 45's instead of sweeping 90's matter for me? <<If true "sweeps"...no>> -My sump is 30x12x14T, is this big enough for this flow? <<Many variables to be considered here (plumbing configuration, dynamic water levels, transient water volume, etc., and not the least of which, your (your spouse's) tolerance for noise), but generally speaking this should handle 900 gph just fine>> I will start with the bio balls and evaluate later to remove. -For now I would like to go with an in sump pump, maybe a MAG, can I use just one pump and feed it up to a "T" with two over tank feeds? <<You can>> -Or should I use two pumps???$$$$ <<A single pump suitably sized will serve fine. My advice would be to "oversize" the pump slightly and install a gate-valve on the output side to temper flow as needed. You'll appreciate the extra power/push once the plumbing lines begin to restrict from the inevitable build-up of bio-film>> -I would like to just use one, can I get enough flow to turn the water over 10-15 times an hour? <<Not with two 1.25" bulkhead drains...nor may you want to push this much water through the sump...but at any rate, this much flow will require more or bigger throughputs>> -If I use just one, what size would you recommend to return lines before and after the "T"? <<Best to follow the manufacturer's recommendations>> Or if, I use two with no "T" what size line? Can I start with one pump and a "T" setup to save $$ and change later to two later? <<Sure...changing to two pumps is not necessary, though having the "built-in" redundancy is not a bad thing in case of a pump failure>> -What size pump, in flow - do you recommend for this setup? <<A Mag-12, with previously mentioned gate-valve installed>> Which in-sump pump is best for low heat? <<The MagDrive pump work well for me>> -Are gate- or ball-valves better for me? <<Gate-valves...much easier to make fine adjustments>> -Would this whole thing work better with an external pump? <<Either can do the job...but a submersible pump is usually easier to employ>> Whew!!!! Thanks so much for taking the time to help with my, I mean our, Obsession!!! <<Indeed my friend...I'm happy to assist>> Hopefully this all makes sense to you. <<Yes>> And sorry for all the questions! <<No worries>> BTW, this is tank #4 in my house, I'm finally growing up at 36, and getting away from the hang on filters. Randy <<Good luck with your project, EricR...49 as of yesterday and still not quite grown up>> Tank perimeter trim and back wall over flow vents 8/30/06 Hey crew! <Jean-T> I made a sump out of an old 55 gal tank. I added silicone over the existing silicone <Not a good practice... doesn't adhere well. Should be cut out, replaced...> just to be safe. (I know this is somewhat useless since its the film between the glass that does the job.. <Oh! Yes> but I feel better still) I noticed that the plastic perimeter trim on the top and bottom of the tank was cracked in all corners. <Mmm, this is more for assembly, looks than structural...> I am having a hard time finding replacements at local pet shops and have no credit cards to order them via internet. <Make a deal with someone who does... send them a check in advance...> Do I really need this trim ? <Mmm, very likely not> I have 4 baffles in the sump so this may compensate as reinforcement?? <To some extent yes... I wouldn't worry re... you probably won't have this filled very high...> Also I have 4 drains across the top of my back wall (1 inch bulk head) and my pump will be pushing 1200 gph. Do I need to pipe vents into the overflows so they can draw air? <Mmm, likely a very good idea to have "tees" at the down junctions... may well have to aspirate these to cut the "gurgling" noise... See WWM...> I once herd that if no vent is present it can greatly lessen flow? is his true? <Mmm, in some cases these small diameter lines can/do operate as siphons... but this is not a good idea all the way around... if the size, number of drains is insufficient and one or more should become occluded...> Do you think my drains will handle 1200 gph? <No... all this is gone over and over...> my return to the tank is via 4 3/4 inch returns ? does this sound right for 1200 gph in a 90 gal tank? <Depends on the pumping mechanism, but no... not real 1,200 gallons per hour> tanks so ever very much for your precious time! thanks!!!!!!!!!! Tristan!!! <Please read here: http://wetwebmedia.com/marsetupindex2.htm Scroll down to the areas on plumbing, overflows, bulkheads, noise... and read... Better to re-drill, fit large-enough through-puts now. Bob Fenner> Using Old Rock/Drilling Bulkheads - 08/27/06 Hey guys, <<Hello (but don't forget the very capable ladies here as well)>> Thanks again for your time and dedication to our hobby! <<Is an honor/pleasure to help>> I have 2 issues I need help with: <<Alrighty>> First, I have read thru the LR section in depth and could not find an exact match to my problem. I recently purchased a used, and neglected 120 gallon that housed a single clown grouper with several large pieces of rock (it was a FO with rock??). <<Indeed...that would be a FOWLR (Fish Only With Live Rock)>> I have kept the rock wet for a few days and can see a few small life forms on it (actual moving little white/clear bug things). <<Amphipods...probably>> The rock looks terrible as the tank was neglected and the rock is all dark brown and black. I will be setting this tank up as a FOWLR and I am thinking that I would like to start over with the rock. Letting it dry and cleaning it somehow and then letting it cure in the tank for a month or two before adding new fish (pending testing results). <<Mmm...letting the rock "dry out" will negate its benefits...why not simply keep the rock as it is? If the color is an issue, it will likely change with improved water quality/lighting>> Can I get the rock to look better? <<Depends on what you consider is "better">> Is it worth losing whatever life it has on it? <<Not in my opinion>> It was not really a traditional live rock, <<...???>> it has life but it looks very bad. They are great sized pieces. The substrate is crushed coral, I would like to reuse it. It also has black and brown staining on it. <<This is most likely forms of algae, and will "change" with changes to the environment, as stated>> Can this also be cleaned? If so how? <<Swirling/rinsing with clean saltwater will do the least damage, though you will still loose some biota>> I don't mind starting over on the rock but will my cleaning methods effect any future fish or possible changes to inverts/coral down the road if I go that direction? <<Indeed it will...you could give the rock a rinse and a "light" brushing with a soft-bristle brush, or replace it (entirely or in portions) with fresh live rock>> Second, the tank is a traditional (non RR) tank. It came with a sump/wet-dry and a HOT overflow. I am weary of the overflow as I hear that they will eventually fail. <<Is a good chance, yes...but this risk can be lessened a great deal by employing a redundant system (two siphon overflow boxes) with the first>> I have once again read on WWM about tank drilling and am thoroughly confused by all the different opinions and issues. <<Let's see if I can help un-confuse you>> I would like to drill the rear for 2 sump supplies and 2 sump returns. Where exactly (how far down and over/apart) do you recommend? <<Well, if you've established the back glass in non-tempered, I recommend you place the throughputs the width of the hole-to-be-drilled from the edges of the tank, and no closer re to any other throughputs...clear as mud? For example...a heavy duty 1.5" bulkhead requires a 2.6" hole...the edge of the hole should be no closer than 2.6" from any edge of the tank, or from any edge of another bulkhead hole. Adjustment of water height in the tank can be accomplished with elbows to raise the level of the pipe outside the tank, or used as adjustable "overflows" within the tank>> Also what size is best for this size tank if I use a strainer for the supplies down and a directional elbow for the return up? <<Two 1.5" bulkheads for the drains, and one or two .75" or 1" bulkheads for the returns...or you can simply plumb the returns over the back/ends of the tank>> Should both the supply and the return have a T installed before the sump? <<For what purpose?...in what configuration?>> Also, are there and tips for drilling? <<Indeed, yes...have a read here: http://www.wetwebmedia.com/pbholesfaqs.htm >> I have seen a tank drilled before and they used cooking oil for the lubricant while cutting? Is this OK? <<I've always just used water for lubricating the drill bit...works well and is easy to clean up>> I plan on ordering the needed bits online, any recommended sources? <<Several choices about...I bought my last bit here: http://www.diamond-drill-bit-and-tool.com/Diamond-Drill/MAIN.htm >> Any tips? <<Heat is your enemy...follow the recommended rotation speed for the size core drill bit used. The manufacturer states these bits can be used "dry", but use of a lubricant (water) will keep heat down, greatly extend the life of the bit, and speed the drilling process...I use simple 'Play-Dough' to create a "damn" around the area to be drilled and fill/refill with water as needed while drilling. Also, when possible, use of a drill-press or drill-jig to keep the bit vertical to the glass surface will lessen the chance of damage/fracture of the panel>> Thanks once again for your help and contribution to our obsession!!! Randy <<Quite welcome. Regards, EricR>> Refugium Size/Overflow Surge/Skimmer Adjustment - 08/25/06 Hi Everyone, <<Hello Diana!>> I just installed a Refugium (it is 36"x18"x13" with the refugium being 15"x13" does that seem big enough for my tank?) on my 150 Gallon reef tank. <<Whether this is "big enough" is a question that can't really be answered...bigger the better as you are probably aware. But the fact it is there "will" provide benefit to your system>> I have two pumps in my return (one for returning water straight back to the tank the other goes thru the chiller and UV light). Now here is my problem.......When I have both pumps running the overflow on one side of the tank is putting out air thru the hose back into the skimmer area. <<Is having problems handling the volume...efficiently>> It seems like the overflow pipe is filling up to fast with water and the air hole in the overflow pipe can't keep up so it creates suction. Does this make sense? <<Sorta <grin>. What's happening is the volume of water traveling through the pipe with both pumps running is trapping/preventing the air in the pipe from escaping efficiently. This are is then pushed to the sump (the bubbles you see being created there) and/or building to the point that it surges back up the overflow pipe (intermittent rushing/flushing sounds)>> My question is how it comes that it only does it on one side and when both pumps are running (I guess I answered that one already since it is putting more water into the tank with both pumps on). <<Indeed>> Now my main question would be how I can fix this problem? Any help would be appreciated as I would like to get my water flow going again and make my fishies and corals happy. <<The easiest solution would be to install gate-valves on the "output" side of the pumps and temper the flow down to what the overflow can quietly and efficiently handle. Another approach is to "aspirate" the return line by inserting a length of small diameter tubing (exact diameter and length of insertion will require experimentation do determine optimum performance) to help with the escape of entrained air from the line. This method will usually yield some improvement to water flow but is no panacea on its own and will probably work best if employed with the addition of the gate-valves as mentioned previously>> One other quick question, if you don't mind. <<Not at all...>> I just hooked up an ASM G2 Skimmer in my refugium and I was wondering if there is any hints on how to get it working just right (as of now I'm only getting greenish water)? <<Simple adjustment of the riser-pipe will change the concentration of the skimmate. If the skimmate is too thin for your liking, adjusting the riser-pipe "down" will lower the water level in the skimmer body yielding a thicker skimmate... you will likely have to "play" with the adjustment a bit to find the desired height/skimmate production>> Thank You, Diana <<Quite welcome. EricR>> Equipment...Tank Modification 8/19/06 Hey guys/gals... <Hello Dave> This may be my fastest question yet... <And, my fastest answer.> and I'm pretty sure you don't have anything posted on your resources. I have a pretty standard 90 gallon that's been running for 4yrs. I want to start getting into corals and am taking the necessary steps to accommodate them. I bought a Tunze Wavebox thinking that the massive yet gentle flow back and forth would be great for the corals... <Is> however, my corner overflow in the tank was built a touch too high. I have about 2cm of room between the water top and the lip of the top border around the tank. Tunze recommends a MINIMUM of 5cm. I don't want to drain the tank and have the overflow ripped out. The plastic (or whatever it is) border on the top that includes the lip for which to place the glass covers (do u <you> know what I am talking about?)... <Yes> from what I've seen, most tanks have them. Can this be easily knocked off the top or removed?? <If you are talking about the black/oak trim on the top of the tank, <<Is not... is talking re the inside structure for the tank's overflow... if plastic of some sort this can be cut, though not easily... I would drain the tank to do this... many bits of plastic otherwise... RMF>> (glass tank I presume??) this small lip that supports the glass can be removed to accommodate the space the wavemaker needs. Is this is what you have in mind? Have you ever heard of anyone building more height onto their tank? <No, not safely.> I'd like another inch or inch and a half. Note, the water level would never be higher than the original sturdy glass... the extra inch or so of glass would merely serve as to accommodate the little 5cm water movement from the wave. Any suggestions, comments, advice?? <I'd contact Tunze with the above question, get some input from them. http://www.tunze.com/117.html?C=US&L=1> If not... would a Tunze Wavebox have any outstanding benefit in a fish only predator tank of 200 gallons? <Yes, very beneficial. Will help keep detritus/waste suspended for more efficient removal from the tank. Also has a cleansing effect on the rocks, corals, etc. James (Salty Dog)> Dave Overflow Noise/Glass Scratches - 08/15/06 Hi,
<<Hello!>> I have a 54G RR Corner tank with a 1" drain
and a 3/4" return. <<Sadly undersized throughputs...even on
this volume of water>> I bought the whole reef set up used, but I
can't imagine how the previous owner tolerated the noise!
<<Mmm, indeed...you can't really put much water through a
1" drain before it becomes problematic>> I installed a
1.25" Durso standpipe (1" did not work, now I follow
directions, doh!). I have a 1/8" drilled hole in the
top of the T of the Durso. It was fascinating to watch the
relationship between the air hole size, the drain line position
relative to the sump water level, and the gurgling and flushing effect.
<<Ah yes, you are finding out just how "fiddly" it can
be. I would like to suggest you try enlarging the hole just
enough to push some airline tubing through and down in to the
standpipe. This will help with aspirating/releasing air from
the drain line and often eases the gurgling sounds. It will
take some experimentation to determine the best length/diameter tubing
to insert>> As I slowly increased the air hole from a pinhole up
to 1/8", I observed the step by step decrease in flushing effect
amplitude. <<Yes...allowing that air I mentioned to
escape more readily>> It started at about a 3-inch oscillation,
at 1/8, it was gone completely. Adjusting the drain pipe
position also impacted the flushing effect and required small changes
in the air hole. <<Pretty much all comes down to
eliminating the obstructions (air bubbles) to the water
flow>> OK, on to my questions: I
have extensive bubbling/gurgling noise in the sump from the drain.
<<From air that is "carried" down the line by the
water>> I have read on WWM two things to try: A "T" or
"Y" fitting on the drain line, and aspirating the drain line
from the top with air line tubing. <<Yes indeedy...though I
prefer a 45- or 90-degree ell fitting on the end of the drain
line>> I am confused about the specifics of both of
these. For the T or Y fitting, how is it positioned?
<<Is of little consequence...just position to direct flow in the
direction you desire>> I am guessing that it goes at the bottom
of the drain line, with one leg submerged and one leg above the sump
water level? <<Mmm, okay...I think I'm with you
now. The purpose of the fitting on the end of the drain line
is to "slow" the rush of water a
bit. So...experiment with the position to determine which
gives you best results. Either way you position it, I find
that having the end of the drain line completely submerged usually
works best. And do be aware, it is usually not practical to
expect a 1" drain to flow more than about 300/350 gph without much
hassle and noise, as you seem to be experiencing>> For the
aspiration tubing, is the tube supposed to have its own hole separate
from the existing air line in the Durso T cap? <<Refer to my
earlier comments re>> Or does it simply go down the same hole?
<<Yup!>> It also seems to me that the bubble/gurgle would
be reduced if I had the water break on some live rock rubble or other
irregular surface. <<Can give it a try>> I think I have
seen reference to using filter pad material. <<A detritus
trap>> Next question: Even though I only have about a
2-inch drop from the overflow wall to the top of the water behind it,
it still makes an annoying, trickle noise that induces the need to
visit the bathroom at night (tank is in the bedroom).
<<Hee!>> I am thinking of installing some kind of
stepladder down to the surface. Or perhaps a piece of filter
pad would also suffice. How have you seen this done?
<<Raise the height of the standpipe to raise the surface of the
water in the overflow...it only needs to "fall" a fraction of
an inch or so>> Last, the tank is used, and has
a good number of extremely fine scratches that are visible depending on
angle and lighting. I have read that you generally shy away
from glass polishing/buffing, but that usually seemed to be because the
e-mailer was asking about significant/deep scratches. What
do you think about using a commercial buffer on an orbital drill pad,
and follow with a thorough cleaning? <<I think you'll do one
of two things...nothing at all...or make it worse. Scratches
in glass "can" be repaired/removed, but unless you really
know what you're doing/have done this before, I recommend you refer
to a professional for advice/consultation. You may find it
is easier/cheaper to replace the tank...or learn to ignore/accept the
scratches>> Jack
Overflow box/es...? 7/31/06 I am in the final stages of setting up a 157 gal reef tank. Besides the tank volume it will also have a 40 gal sump. I bought a Iwaki pump rated at 1100 gph. My question is how large of a overflow box should I purchase (I know a drilled tank would be best but one buys what one gets a great buy on) Should I purchase one rated at 1100 gph or one larger and then adjust it to the flow I need. Thanks Robert <I would purchase/use two such designated flow devices, if not re-consider having the tank drilled... Much to discuss... Please read here: http://wetwebmedia.com/overfloboxfaqs.htm and the linked files above where you'll lead yourself, till you feel confident re what your choices are, your best direction here. Bob Fenner> New Display-Questions on Bulkheads/Sumps/Filtration - 07/21/06 Dear WWM Crewmember, <<EricR here...how can I be of service?>> I have been a freshwater aquarist (125 gallon) for many years and am now taking the leap to marine. <<The experience will serve you well...but still, much reading/research ahead of you>> I have researched your excellent site and read through The Conscientious Marine Aquarist. <<A good start, but don't limit your research to a single source. Opinions/experience is varied and wide. Gather your information from varied sources and use your own good judgment to make decisions re>> I have learned tons but still have a few questions regarding my specific needs. <<Alrighty>> I am interested in purchasing a 175 gallon Oceanic bowfront w/ two MegaFlow overflows (rated at 650 gph each, for a total of 1,300 gph). <<Mmm yes, generally undersized and overrated overflow systems. For simplicity of plumbing/maintenance, and to ease noise/bubble issues, I would plan on/expect about half the rated flow>> Although I intend for it to be a FOWLR set-up, I know one day after much experience I may want it to become a reef tank and want to plan accordingly for flow. <<Yes, best/easiest to plan/plumb at this stage>> Not to mention I'd also like the flow increased for the FOWLR set-up anyway. <<Indeed...vigorous water flow benefits fish as well as coral>> Therefore, when placing my tank order from my LFS I am going to have Oceanic drill larger bulkhead openings. <<Ah! You "have" been doing some research! Excellent my friend>> It comes standard w/ holes large enough for 1" outlet and 3/4" return inlet. <<Yes...unfortunately>> I'm hoping the MegaFlow overflow is large enough for holes sized to accommodate 2" bulkheads. Do you know if this can fit in their MegaFlow overflow? <<Mmm, don't know...perhaps you can order these "upsized" as well>> What about increasing the 3/4" return inlet if it fits within the overflow - should I do this as well? <<I would, yes (1"). Can always be "necked-down" at the tank if you need more "velocity">> Any bulkhead size recommendations for this specific overflow would be appreciated. <<As big as you can go with the current overflow box...or upscale the overflow box>> On to sump/refugium questions... <<Okay>> I am planning on purchasing a 55 gallon capacity sump/refugium from S P Aquatics... <<No chance of separate vessels for these? Using a single vessel for both can be/is done by many, but generally one methodology (sump or refugium) or the other suffers, in my opinion. But I find separating the two eases equipment placement, attenuating flow for each, maximizing space, etc....and greatly simplifies isolating one from the other when/if necessary for maintenance/repair>> They have two designs (or will customize) and I have no idea which might be best for my set-up. The "X1" models have the display drain area on one side, water moving through refugium in middle, then water moving to skimmer/return area on the other side. The "X2" models have a display drain/skimmer area on one side, another display drain/refugium area on the opposite side, with both sides flowing water to a middle return area. Any ideas on which one might be best? <<I think the "X2" is the better design...less chance for the skimmer to "rob" you of beneficial organisms from the refugium>> I plan on using a EuroReef CS8-3 skimmer. <<Ahh, wonderful...I love these skimmers...use a CS12-3 myself>> Also, in addition to the skimmer, I'll use live rock in both the tank and refugium - should I employ wet/dry filtration in this sump as well? <<I wouldn't, will consume a lot of space which will already be at a premium as you'll discover. Obtain and use a fluidized-bed filter...great for FO/FOWLR systems...will ramp-up/adjust quickly with fluctuating bio-loads. Will also be much easier to "disengage" than a wet-dry when the time comes>> Your help is much appreciated - thank you. Martin <<Happy to assist. EricR>> Wet-dry, overflow, pump... how do it work altogether? 7/13/06 I currently own an Amiracle Wet Dry filter that sits by the side of my 75 gallon aquarium and takes up space. I unplugged it about a year ago because every time I turned it on, I either had water that overflowed the sump or that overflowed the aquarium. When I called the manufacturer, they advised that if I installed the right return pump, I should never have this problem, and they recommended that I purchase a particular pump. However, the pump that they recommended had been discontinued. What do you recommend? Murray Meeker <Mmm, reading here: http://www.wetwebmedia.com/overfloboxfaqs.htm and the linked files above to gain a "good-enough" understanding of what you're up to here. There needs to be a balance twixt the total volume of water present and what is "in play" in terms of flow rate through the device/s used to get water from the main tank and back... Not a guessing or blind game of "who said what". Understand what you're doing, then act. Bob Fenner> Closed-Loop Plumbed Through Overflow? - 07/13/06 Friends at WWM, <<Greetings Scott>> What kind of problems would you foresee running a closed-loop and a sump out of the same overflow box? <<Hmm...would appreciate a bit more information to wholly understand what you are attempting. You'll need to plumb each to its own throughput/drain...you'll need to ensure the box can handle the volume of water/won't starve the pumps...and then there's the noise such flow/volume brings...>> Thanks, Scott <<Regards, EricR>> Optimistic Flow Rates - 07/11/06 First of all great website, I've learned tons and spent hours reading posts, thank you. <<You're quite welcome...glad you find the site beneficial>> I tried to find my question but had no luck. <<Let's see if I can help>>>> I have a 300 gal FOWLR with a 50 gal sump. I am running two twin tube hang on the back overflows, both with twin 1" drains. I read I should be gravity feeding 1200 GPH for each box totaling 2400 GPH to my sump. <<Read? Where? No way on Earth you're gonna get 1200 gph to "gravity flow" through a 1" drain. 1200 gph may be the "rated" flow on the overflow boxes...but it's not going to happen with a single 1" drain>> My return pump is the Mag 2400. I want high flow as I have groupers and triggers in this tank. <<Mmm, yes...most all fish species appreciate good water flow. Though I'm skeptical when it comes to processing this much water through a sump. But if the noise, bubbles, splash is not an issue with you...>> I used 1" for everything. <<Not big enough>> Right off the pump I have a check-valve, spring type from Lowes and a ball-valve on top of that all in the return line. <<The check-valve is not a good idea. Aside from metal contamination from the spring and the huge lose of flow incurred when using these devices, the valve will inevitably fail at some point...usually when no one is around for a long period. Much better to adjust your skimmer boxes, return lines, and the water level in the sump to handle all transient water when the power is off. I'd also like to suggest you replace the ball-valve with a gate-valve...will give you much more "finesse" when flow adjustment is necessary>> Then it goes up the back of the tank and tee's to the ends when I have a 90 up then a 90 over then a 90 down and a 45 into the tank. <<Mmm...head pressure indeed. Between the check-valve and the elbows I doubt your getting little more than half the rated flow of the pump>> I hope you can picture this. <<I can>> The problem is even with all that head pressure from 10 90-degree fittings, the ball-valve and the 45-degree fittings, I can't run the pump at even 50% or the aquarium overflows. <<Not surprising. At the "most", I think you should expect 500-600 gph from the 1" drains...about half that if you want a bit of a "safety margin" or to keep things quiet>> I have to turn the ball-valve closed by almost half way for the tank to not overflow. <<Indeed>> Will changing the return plumbing to 2" help fix my problem? <<Ahh yes! Will improve things by a huge margin>> Very confused, and lots of different formulas and theories. <<Agreed...and most seem a bit "optimistic" to me where flow rates are concerned>> Please Help. Thank you, David <<I hope I have. Regards, EricR>> Optimistic Flow Rates II - 07/11/06 Ok, I was told by US Plastic's that a 1" drain will flow approximately 600GPH. <<Yes...hear this all the time. But I can tell you a more practical expectation is about half that. A 1" drain may indeed be "physically capable" of allowing a gravity flow of 600 gph...getting it to work so in an aquarium application is another matter>> My overflow boxes have dual 1" drains. That's where I figured 1200GPH per overflow box. <<Oh, okay...did not get that from the first email>> Four 1" drains for a total of 2400 draining to the sump. <<I see now. But as you have discovered...not a practical flow rate>> The bottom of the overflow box has a 1" union going through it. <<Not a "union", is a "bulkhead"...two different fittings>> So do I need to try and drill a bigger hole in the bottom of the overflow box to accommodate for a bigger bulkhead or can I just adapt a 2-inch pipe to the 1-inch bulkhead. <<To increase the flow rate you will need to increase the size of the throughput (bulkhead fitting and drain pipe). Just adding a larger pipe to the 1" bulkhead won't help, it still leaves you with the smaller restriction at the bulkhead>> I also have the 1" U tubes. Do those also need to be bigger? <<Likely bigger AND more of them. Actually, you might try this first. With all the head pressure on your pump, the four 1" drains may well handle the flow and the real problem is your siphon tubes are not keeping up>> And worst case if I can't drill the bottom of the acrylic box to adapt for a bigger pipe, can I just add another dual-drain overflow box? <<If there's room...certainly>> Then not only would I have a plumbing nightmare, but I'd have SIX 1" drains going into my sump. <<You may want to consider alternative methods for creating flow and assign a smaller pump to service the sump>> I would like to keep the high flow rate as it seems to make a difference in my other salt tanks. <<I would agree, but it doesn't all have to be processed through the sump. Not having a drilled tank makes a closed--loop problematic...perhaps some Tunze Stream pumps?>> I never imagined this to be this complicated. <<Designing/building the drain system can often be challenging>> I greatly appreciate the help in your fast response. Thank you <<Very welcome, EricR>> Overflow Not Skimming - 07/04/06 Hey Crew- <<Hey Brenton!>> It's been a while so I guess that's a good thing!! <<Hee!>> I have a 100G reef and a 55G refugium tank going into a wet/dry box. In my 100G the skimmer box/overflow works great, but the setup with the 55G tank's skimmer box/overflow doesn't work as well as it should. <<Hmm...perhaps due to decreased flow vs. the display?>> It seems that I can't get the water level inside the skimmer box low enough for the surface tension to be broken before going out through the U-tube. <<...?>> If I look at the surface of the water from underneath I can see what looks like an oil slick covering the entire surface, except for a little area where my return U-tube is located. <<But this "slick" is only in the skimmer box, not on the surface of the refugium, yes? Little concern if so...is being mixed/drawn out>> The water level in my 55G is only 1/4" higher than the level in the skimmer box. The difference in my 100G tank is almost 3". <<Differences in flow rates>> I have a Model 7 pump feeding the 100G (1" overflow tube) and a Model 3 (350 GPH) going to the 55G (1" and a 3/4" overflow tube, yes 2 tubes at once). Without the 2 overflow tubes the skimmer box "floods", meaning the water level of the tank equals that of the skimmer box. <<Mmm...obviously the siphon on the display is much more efficient than those on the 'fuge. Perhaps studying these will reveal the problem>> Is this pump too powerful for the amount of water in the tank? <<Has nothing to do with the size of the tank...my guess is it's a function of the position of the refugium (height above the sump) and the design efficiency of the plumbing...or lack thereof <grin> >> With the DSB I think I only added 25-30G of actual water. <<Shouldn't matter, the 1" pipe should be able to easily drain the input from the 350 gph pump>> When I bought the pump I didn't take the reduced volume of water into account, and now think I should have gone with the Model 2 (250 GPH). Any ideas on how I can remedy this problem? <<Look to the plumbing, see if you're trapping air somewhere. I really don't feel it's a matter of "pump" size>> Thanks as always. Brenton, San Francisco <<Always welcome, EricR...in MUGGY South Carolina Water Noise vs. Flow Rates - 06/30/06 Hi! I am looking for a solution to eliminate noise from the overflow. <<A very common venture>> I tried everything and I started to believe a silent overflow is a myth. <<Hee! Indeed! At least at the "higher" flow rates>> Now there is a way and it would be to dramatically reduce the flow rate. <<This is what I always advocate. There are other things you can do to help...such as aspirating the return lines, submerging/adding ells to the termination ends, etc. ...but reducing flow probably makes the single largest difference. Few hobbyists (if any) need to push 1500gph or more through their sump. Much easier to deal with a sub- 1000gph flow rate here...employing other methods for increased flow in the display as/if necessary>> I have reached the point where it's either that or get rid of the sump and install an external skimmer. <<Mmm, let's work on quieting that overflow...>> Right now the skimmer is in the 1st chamber of the sump. There is already good circulation in the display (15X per hour) from 2 Tunze Stream 6100 with a multicontroller. <<Excellent! Reducing flow through the overflow/sump should not be an issue then>> I do a 5% weekly water change. Most of the sump (25 gal) is in fact a fuge for plankton/pod production and macro-algae. <<All the more reason to keep it>> Display is 90 gal reef with 150lbs Fiji LR and sugar fine 5" DSB. In these circumstances do you see any long term problems involved in having a flow rate from the return pump of only 6X per day instead of 6X per hour? <<Mmm...if I understand you, this would equate to just over 20gph (540gph divided by 24hrs). This is slower than I like, but I think a flow rate of 200gph-300gph would be fine...and easily dealt with/made quiet>> If I may ask at the same time a bioload question. <<Sure>> I am thinking of some change and would like to know if this is too many fish. <<Okay>> Is this a heavy bioload with my set-up, would I be on the edge? : -2 Ocellaris -5 to 7 Chromis viridis -1 clown goby (Gobiodon histrio) -1 mandarin -1 Tailspot blenny (genus Ecsenius) -1 yellow tang (Z. flavescens) <<This would indeed fill you up. I would like to suggest you forego the mandarin. This tank isn't really large enough (refugium or not) in my opinion to be able to provide the necessary nutritional needs for this fish for the long term. I would also suggest you keep the number of Chromis to 5, until you see what (if any) behavioral/environmental issues develop>> Lastly, would an Ecsenius blenny (like the Tailspot) be helpful to control Caulerpa growth in the display? <<I doubt it...the Combtooth blennies are more "filamentous" algae feeders. The tang will probably be more useful for this purpose, though there's no guarantee of that either>> And what about a tuxedo blue urchin (Mespilia globulus) for that same purpose? <<A neat critter...and likely a worthwhile addition...but it too will probably go for your hair, and most assuredly your coralline, algae first. You best bet re removal of the Caulerpa is manual extraction. If you can manual reduce it enough, the tang might be able to keep it in check for you. I guess you'll know better than to add this to your display next time, eh! <grin> >> Many many thanks! Dominique <<Quite welcome. Regards, EricR>> Re: Water Noise vs. Flow Rates 7/1/06 Thanks Eric! <<You're very welcome Dominique>> The Caulerpa I didn't add to the display and not even to the fuge as I am using Chaetomorpha and red Gracilaria instead. <<Ah yes, much better choices in my opinion. I utilize Chaetomorpha in my refugium myself>> It just appeared there uninvited and in two species. <<Hate it when that happens...>> Regarding the mandarin I have to say I kept one for 7 months and it was still fat, but it jumped out of the tank. <<Hmm, I've never known/heard these fish to be jumpers. Would make me think environmental conditions/tank mates were not suitable for it...possibly. Please don't misunderstand my tone here <grin>, but the vast majority of these fish "slowly" starve to death within twelve months. There's always exceptions, and of course those few dedicated hobbyists (maybe you're one of these!) that strive to provide suitable care/environments for these fish...but for the majority of folks, Synchiropus species are best left in the ocean. If you're determined/dedicated to keeping this fish, please research all you can re their care/husbandry on our site and the net in general>> This made me place a net in an anodized aluminum frame over the top of the tank so it won't ever happen again. So to summarize your answer: bioload should be ok (I won't get more than 5 Chromis) and even thought it's not ideal I should not have problems with the 20gph flow rate. <<Indeed...a couple hundred gallons per hour at least. If noise is still an issue, do write back and I'll gladly address this with you further>> Thanks again! Dominique <<Cheers my friend, EricR>> Overflow that would be sticking out of the bottom that the nut screws now plumbing...? 6/29/06 Hello all, It is Gary Austin again. I have a Perfecto 125gal. reef ready aquarium. I also just received a new Lifereef sump and skimmer system. I was dry fitting the sump, skimmer, and had one of the overflow packages in my living room and noticed a small issue. I had the drain pipe in my hand with the bulkhead fitting and nut. I have figured out how to install the overflows in the tank but need some advice on connecting the hose/flex tube to the overflow bulkhead. I was told that the threaded end sticking out of the bottom that the nut screws onto should not have a female connection used to hook up to the drain tube. I looked at the bulkhead and appears that it is designed for a 1" pvc pipe to slide into it. If I do this then I would have to glue a piece of 1" pipe then add a fitting with a 1" hose barb end to connect to 1" flex tubing. The 3/4" returns are the same. Is this correct or can I screw a fitting right onto the threaded end of the bulkhead to make my connection? ! <I would do this latter Gary... No sense, and I mean no sense in reducing the not-so-reef-ready diameter by inserting pipe, using flexible on this end when you can thread over it...> I would prefer to use a female threaded connection in case I need to tear it apart. Please let me know if I have this right or not? I hope this makes sense as it is quite late and my eyes are failing me here. Thanks a bunch and keep up the great work. <Take a bunch of deep breaths, and don't cut/solvent anything until you're "calm"... Realize what your options are. If there are threads on the discharge side, use a smear of Silastic or Teflon Tape, and thread a female fitting over these. Bob Fenner> - Overflow Box and Power Failure 6/27/06 - Hi Bob/ staff, <Hi.> I have joined a forum so I have been bothering you guys less lately, but even the members of the reef tank. com can't answer this one. Here goes. Ok, I have a hang on overflow on the 29. The overflow is by ProClear and has the overflow box with slits and a u tube that carries that water to the pre filter on the back. <Very common design.> suppose this happens. The power fails for an extended period while am away. So the overflow will keep draining water into the sump until the water level drops below the slots, no biggie. But then the power comes back on and the return pump is working again. So all that water gets pumped back and it fills the overflow box slits. Will there still be a siphon or will the tank flood until the sump empties and the return pump blows out? <There should be if both ends of the U-Tube are submerged. This is something you can and should test by simply unplugging the return pump.> the second box that hangs on the outside of the tank is designed to retain water if no new water is coming in because the standpipes comes up a few inches and the u tube gets submerged in their. But I don't know because if water doesn't come into those slots in the internal box, and all the remaining water gets sucked up by the u tube, wont it suck air and have no siphon? <It doesn't start moving until water flowing into the slotted (tank-side) box.> I'm really worried so if it will loose siphon, what can I do to prepare or prevent the possible flooded floor, blown out return pump, and likely fire? <Well for starters, everything electrical in and around your tank should be plugged into a GFCI outlet. That will remediate any possible fire dangers. Otherwise, I think you should unplug your main pump and see what happens. I think you will be surprised. Over the long haul, just keep the U-Tube clean as this is the weak link in the chain.> Remember to look closely at the picture provided in the link. <Am very familiar with this design; have sold more than I care to count.> Thanks John <Cheers, J -- > Re: New 90 Gallon Setup... closed loop issues 6/13/06 Hello Bob, <Scott> Thanks for your reply. <Welcome> Based on the expert advice I have been getting (including yours), I decided to increase the size of my new system to 135 gallon. This will afford enough space for external pumps, and hopefully provide more options for (healthy and happy) fish stocking. <Great> Also, I believe this size should provide adequate space for my Centropyge aurantius (currently in quarantine and eating habits continuing to improve). Would you concur or should I consider finding another home for this beauty? <In the wild this is one of the Centropyge species with a large "territory"... like many cichlids, it can be crowded a bit...> In discussing the new tank configuration with a LFS, they suggested an enhancement which I would be very appreciative to hear your thoughts about (I did not find it addressed in the Circulation FAQ's in WWM and apologize if it has been addressed before). Anyway, here goes - The current setup would use 2 overflows to feed an Ecosystem 3612 (roughly 1200 GPH per the manufacturer) and back to the display. The balance circulation (say another 1200 gph) would be provided by powerheads. My LFS representative suggests doing away with the powerheads and plumbing a separate loop taking water from the back of the tank (about half way up the tank) behind the overflow boxes (the boxes would be equipped with Durso standpipes so that a water column would remain in them). The lines would be joined together to feed a parallel external pump and back to the display via 2-3 additional bulkheads located at the lower portion of the tank. <Sounds like a plan> I like the idea because it eliminates the "issues" with powerheads such as heat generation, exposed intakes, etc., but am wondering if we are drilling too many holes in the back of the tank. Would you have any thoughts to share on this? <More holes can lead to more potential problems... if it were me/mine, I would not cut these through-puts quite so low... "just in case"... But near/closer toward the upper surface... not too close though, to prevent loss of water during change-outs> Thanks again for your help on this project. Scott <Glad to share. Bob Fenner> Regulating Pump Flow... Inadequate Factory Overflows - 06/12/06 Hi Crew, <<John>> I bought an Eheim 1262 to use as the return from my sump to my 90g (with AGA Megaflow). <<I love Eheim pumps...wish we could get some of the bigger ones over here>> It's a great pump, but it seems too powerful for the Megaflow system. <<Not so "Mega-", eh?>> Actually, I should say it seems too powerful to run the Megaflow quietly - water rushes though the system and it sounds like a dishwasher. <<Typical of these undersized (Mega or not) factory overflow systems>> I've read through the FAQs and this seems like a common problem. <<VERY common>> One suggestion that helped was to increase the diameter of the hole at the top of the Megaflow drain tube. However, my system is still extremely noisy, unless I pinch and restrict the flow coming out of the Eheim. <<Replacing the Megaflow drain tube with a Durso-style standpipe might allow both an increase in flow AND a reduction in noise...but still no replacement for the simple want/need of a larger throughput>> So my question is (finally) is it safe to add a ball-valve on the return side of the Eheim, or will this produce too much back pressure and jeopardize plumbing connections? <<This is quite safe and satisfactory, though I would install a gate-valve as opposed to the ball-valve for better "finesse" of the flow. Magnetic drive pumps such as the Eheim respond to/endure this type of control/adjustment very well. But do make sure you install the valve on the "output" side of the pump>> Would it be better to step down to the Eheim 1260 and let it run unrestricted? <<Not in my opinion. The plumbing lines will eventually start to restrict from bio/mineral accumulation...but with a twist of the valve you can step up flow to compensate>> Thanks, John H. <<Quite welcome, EricR>> Online Source for Internal Overflow Boxes - 6/10/06 Hello, <<Howdy>> I have a quick question, I have a 150 gallon drilled glass aquarium and I need new overflow boxes and I can't seem to find a place to get them. Can you give me a website to buy them from? <<Sure! Have a look here: http://www.wetdryfilter.com/internal_overflow_boxes.htm >> Thank you for your help. <<Welcome, EricR>> Overflow Questions 6/1/06 Hello Bob and the WWMC, <James with you today.> I hope all is well and Hawaii was fascinating (jealous). <Talking for Bob, Hawaii is always fascinating, something different on every dive, correct, Bob?> <<Mmm, yes, but back in sunny southern Cal. now>> I am starting to plumb my 50 gallon sump and refugium to my 150 gallon all glass tank and looking for some expert advice. I will make this quick because I know you are all very busy. Is it possible to connect three separate hang on overflows (1) 900 gph and (2) 1400 gph to one central 3" drain pipe with vent? <Yes, a three inch drain will handle this, but why on earth do you need that much flow for a 150 gallon tank? Problem is, if the pump is not sized close to the gpm of the overflows, you will always have problems with air in the "U" tubes. So, at least a 3200 gpm pump would be needed...That's going to be an awful lot of water moving in your tank unless you are trying to establish a tsunami biotope. Ten to fifteen times the tank volume is sufficient. You would be well over 20 times. Tell the fish to hang on for dear life.> The over flows planned positions are... a 1400 gph at each end of the tank with the 900 gph in the center. Thank you again for your time, <You're welcome. James (Salty Dog)> Mark Re: Overflow Questions 6/1/06 Hello Crew and James, <Hello Mark> Thanks for the quick response. <You're welcome.> Hopefully these answers to your questions help clear up what I am trying to achieve. The return pump will be a Mag Drive 36 external , with a 1" schedule 80 pipe (true 1" I.D.) return to a manifold system. The manifold will have 8 outlets, if my calculations are correct I have 14 feet of head loss, total loss of 4.86 psi. Taking this into account, this leaves 852 gph of return divided by the 8 outlets, which equals 106 gph at each nozzle. If you think it is necessary, I can branch off the return line and with another gate valve control the flow back into the refugium or skimmer chamber. Sump flow is as follows, skimmer, 3 baffles, refugium, 3 baffles, return. <A bit more clearer, Mark. Think you should be fine here. Do employ a gate valve at the pump to allow you to throttle down if necessary. A return line back to the pump shouldn't be necessary. If you want to double check your calculations, here is a link for you. http://www.reefcentral.com/calc/hlc2.php James (Salty Dog)> Thanks Again for your time. <You're welcome> Mark Overflow Bulkhead Size? - 05/25/06 Hi, <<Hello>> I was wondering if you could shed some light on the subject of the overflow hole size. <<Sure>> I recently ordered a 135 gallon glass tank w/overflow. The drain or overflow is 1" and the return is 1/2". <<Mmm, typical...and "undersized" in my opinion>> A local fish "expert" told me that I need to cancel the order and get at least a 2" overflow hole? <<If possible, I agree>> Why is this? <<The larger throughput will make it MUCH less problematic to plumb this tank with regards to noise, maximizing flow, etc.>> I do not understand why it matters and I already purchased a ProClear Pro Series wet/dry 150. <<Please read through our marine plumbing article/FAQs, there is much helpful info...you can start here: http://www.wetwebmedia.com/plumbingmarart.htm >> I thought this was going to be a good set up. Am I wrong? <<Can't say for sure, I don't have enough information about your setup or what you plan/want to keep>> Also, he said the glass tank will not hold up with 2 holes drilled in it? Confused? <<...? If the tank is properly constructed with forethought to hole size/location, multiple throughputs should not be a problem>...perhaps you need consider another tank manufacturer> I appreciate any info. Thanks -Dan <<Regards, EricR>> Overflow Box Pump... Bizarre ap.? 5/21/06 Good Afternoon WWM Crew! <Good morrow Josie> I have a question about Tom's Aquatics Aqua Lifter - Dosing Pump and Tom's Aquatics Aqua Lifter Suction Pre-Filter. < http://cc.msnscache.com/cache.aspx?q=3240008336083&lang=en-US&mkt=en-US&FORM=CVRE> I brought these to maintain the flow through the overflow box. <? How?> I had a Toms Aquatics Aqua Lifter - Dosing Pump already, but it was beginning to go out and didn't provide enough flow for the overflow box to keep water flow, so we decided to get a new one. Well, we find out that you should use the Tom's Aquatics Aqua Lifter Suction Pre-Filter in addition to the Aqua Lifter - Dosing Pump. The problem is, there are no directions for installation so we just did what we thought was correct. We had the middle connector of filter to the intake on the pump. Then the outside was attached to the overflow box. The problem is, when we did this, the flow in the overflow box decreased significantly. I did notice that the prefilter is pulling stuff out of the water, so I do believe that it is doing what it is supposed to. It is also still keeping the overflow box primed but the flow is very low. Can you tell me if I am doing this right or is it supposed to be a slower flow? <... I don't think this gear is useful here... in this application. This is a dosing pump... and an in-line filter... not intended for recirculation... or any attachment to an overflow...> It is quite loud with the Pre-Filter attached as well. It's almost as if there is air in the filter or something that it can't clear out. Any suggestions?? <... Contact Tom's and ask them... And read here: http://wetwebmedia.com/marsetupindex2.htm Scroll down... read re Marine Plumbing, Overflows...> By the way, the lionfish that I wrote about a month or two ago is back to not eating. It's almost as if he is starving himself on purpose. We still add trace minerals to the water to prevent lock jaw again, but this time it's different. He shows zero interest in food. All the other fish in the tank eat as normal and all seem quite healthy. We have tried multiple times to hand/force feed the lionfish. We try daily with no results. I have read that sometimes lionfish do this and starve themselves to death. Thanks much! Josie <See elsewhere on WWM re Lionfish Foods/Feeding/Nutrition. Bob Fenner> Compatability... rambling... chewed Gramma mostly, netting over egg-crate - 05/20/2006 I'm curious... I have a 90 gallon salt tank with a deep sand bed. <Okay thus far...> I recently added a Royal Gramma to my tank that includes two 3" long firefish (gobies), a Flame Angel, and a yellow watchman goby. I noticed the Gramma had his tailfins picked two days ago, but he was alert and feeding. He was out swimming around even with the Flame Angel. He hides in a little hole at night. I also happen to have a tiny mithrax, two serpent stars, and a sand star. I noticed a small flesh wound on him yesterday morning. Last night he had multiple flesh wounds and was half eaten (his tail right up to his body). <... Uhh...> Actually, yesterday was a bad day. One of the firefish ended up swimming through the eggcrating on my overflow and was stuck against the drain in the bottom of the overflow. The little guy is now in fishy heaven. Any suggestions to fix my eggcrating? <"Fiberglass"/plastic screening around it... Home Depot, Lowe's...> When the aquarium service setup my sump system and overflow... they installed eggcrating with about 3/4" squares in it. I was thinking of getting some fish netting to cover on the tank side? <Good idea... this can be affixed with Silastic or Zip-ties if you want... or just cut, draped over... Bob Fenner> 180 AGA with twin overflows question - 05/19/2006 Hello WWM Crew, Love your site. Your FAQs are always the first place I look when I have aquarium questions, and I couldn't seem to find the answer to the issue I am facing with my brand new 180gal (6'x2'x2') AGA with twin Mega-Flow overflows and an AGA Model 4 Sump. The tank is built into the wall in my basement, on a DIY stand made from 4x4s, 2x4s, plywood, and carriage bolts. The concrete basement floor is not level, but I purchased a 4' carpenter's level to help me with properly leveling the aquarium. I spent the better part of an afternoon leveling, filling, draining, shimming, and re-leveling the aquarium until I've reached the point where I am satisfied that the tank is level. The bubble is inside the lines no matter where I place the carpenter's level on top of the aquarium. Here comes my problem, I fill the tank up and the water spills over the overflow boxes, but the left overflow box seems to fill up faster than the right overflow box. Does this mean that my tank is still not level? It took the right overflow box almost another full minute to fill to the point where the water drained down the Durso standpipe into the sump. Could this be an issue with the way my tank was manufactured, as in maybe one overflow box was off by a few MMs when it was assembled/siliconed? Or is it more likely that my tank is still not "perfectly" level? Is this something that I should be concerned about? Will this reduce my flow significantly out of the right overflow box into the sump? Any thoughts you may have are greatly appreciated. Thanks, Dave <<Dave: I have the same tank on a stand. While I don't have stand pipes, my overflows seem to drain about the same. It could also be the height of the teeth at the top is different or the number of teeth on one side versus the other. If you are convinced that your tank is level (you might want a second opinion from someone else to make sure), then everything will probably be OK. Another test of whether it is level or not might be performed by measuring the height of the water to the top of the tank with a ruler around various points. If it's the same, you're probably level. Best of luck, Roy>> Refugium, Pump, and Overflow Sizing - 05/17/06 Hi, <<Hello!>> Have been doing much research on reef tanks, mostly on the web and came across your site, what a find, very impressive. <<Thank you>> I just bought a 100 gal DAS reef tank. It's got a single 1-1/2 inch sump drain in a corner. I wanted to put the large CPR Aquafuge under it and use an external 1000 GPH pump for circulation with a SCWD wavemaker. <<Mmm, which model Aquafuge? Unless you're talking about the "Aquafuge Pro" it is too small/not really suited to this application. It would be better/cheaper to employ a small aquarium (20g/29g) for this>> My questions are - 1) Is the pump too big for the drain? <<My opinion?...yes. Most overflow "calculators" will tell you you can get 1200/1300 gph from a 1.5" drain. And under "ideal" conditions maybe so...along with lots of noise and continuing fuss. But tank conditions are rarely ideal...plumbing is not always optimized...and there's the fact the plumbing will slowly become more restricted from mineral/biological buildup. I think it is much less problematic to "tune" your overflows when you only try to push "half" the rated flow. That leaves you in this instance with a pump that will push 650 gph or less (after determining/calculating head loss) to the overflow>> 2) Is the refugium big enough? <<Depends on the model>> 3) Is 1000 GPH too much flow through the refugium & if so how would you control it separately? <<With a smaller pump...perhaps a Mag-Drive 9.5>> And lastly; 4) Is the skimmer that comes with the CPR any good? <<I think you will be disappointed. I would replace this...look to ASM, AquaC, Euro-Reef, others...>> Thanks in advance for any help. <<Very Welcome, EricR>> One pump or two? 5/15/06 Hi Crew < Hello Adlai! > I am trying to plumb my new 120 gallon and wanted some advice before going down this path. Taking your advice I swore that my next tank would be reef ready - no more dinking saltwater for me via J tubes. < I cant say I blame you a bit! > The tank has 2 overflows rated at 600 gph each so I expect 1200 gph approx into my sump. In ADDITION to sending water through the 2 returns which come with tank setup I also plan to draw water from the sump via a SCWD using a ViaAqua 2600 rated at 740 gph. This means I will have 4 returns (2 with the overflows and 2 with the SCWD) using the sump water. So I figured I needed approx a 1200 gph submersible to make allowances for head loss pressure etc. Since the drains are only rated at 1200 gph that is the maximum amount of water that will be coming in to the sump which is 12X24X14. The 2 returns can be powered by either 1 pump (any recommendations) or 2 separate pumps ( I have an Eheim 1260 and a ViaAqua 2600). In addition, another ViaAqua 2600 which is also in my sump, will be shooting water through a SCWD and 2 separate returns. In regards to the SCWD return, my thinking is that since the ViaAqua is rated at 740 gph, I expect about 50% of water flow because of the SCWD and the returns i.e. approx 370-400 gph of flow. < You are correct, the SCWD reduce the gph significantly. You may want to employ a larger pump to enjoy the benefits of the SCWD. 400-500 gph will be almost unnoticeable. Think about running the SCWD on a closed loop, with a pump rated for 1000-1200 gph. This can be done without drilling any more holes in the tank. When plumbing the SCWD, consider installing true union ball valves. This will allow you to shut off the water completely, and service the SCWD without losing too much water. Some people will have a secondary SCWD to switch out, while cleaning the first. > In regards to the regular returns , the Eheim I currently have is rated at 635 gph will give me about 50% water flow at a 5 foot head approx 320-400 gph. The other ViaAqua 2600 will give me about 350 gph at 5 ft head So when I add all 3 pumps in the sump I will be getting approx the 1200 gph which the returns are rated at. Are there any flaws to this logic? < Three pumps in the sump may generate too much heat! > Am I not considering any potential challenges. Should I just use 1 submersible pump to send water back the 2 tank returns so that I will only have 2 pumps in the sump. < Think about running one pump for the return, rated at or near 800- 1000 gph. With the build-up of detritus and biological waste over time, the maximum water handling of the overflows will be reduced. It is better to be slightly underpowered in that regard. Also, if contact time is crucial in the effectiveness of the filtration methods employed in the sump, slower is better. Think of it this way... Let's say your job is to steal hubcaps. Would you be more successful on the freeway, or in a parking lot? > I hope this makes sense. < Makes sense to me! It is good to see planning and consideration! > Thanks in advance < You are very welcome. RichardB > Standpipe plumbing, bubble-madness (and noise if you're really lucky!) - 5/12/2006 Hi guys I need some serious help. I just purchased a 75gal to replace a 75gal that was old and leaking. I got an All-glass with the MegaFlow overflow already installed. <Hopefully one with the larger through-put/holes> Ever since I installed it and turned it on, I have been having a problem with air bubbles in the drain line from the tank into my sump. Is there anything that can be done to correct this? <... some> It is the standard 1 1/4" standpipe with drilled aquarium bulkhead fitting, then it goes straight down to a flexible pipe (pool hose stuff) and into a 20gal sump. <... have you tried aspirating this line?> I have tried to raise the standpipe, lower the pipe etc. I do not understand why the air is getting into the drain line. <It is "entrained"...> Before I used the stand pipe, I had a corner overflow, with bioballs, on the drain line I had a valve and that regulated the flow so I would not empty the overflow. I have tried this with the standpipe and it does not seem to work. when you slow the flow, the water stacks up in the overflow. I am at my wits end at this point and am very unhappy with the whole MegaFlow/standpipe thing. It looks like it might be a great setup, but mine just isn't working properly. any help would be greatly appreciated. I have a Quiet one pump to supply water back to the tank, not sure what the size is but I have not changed it from tank to tank. Thanks, Chris <Mmm, this technique is described in various places on WWM, but basically, inserting a length (to be determined... so don't cut it just yet) of rigid or flexible "air-line" diameter tubing... nominally 3/16" into the standpipe... and trying this at different depths within the standpipe... should yield relief from the "entrainment"... try this and see. Otherwise, do Google on/with WWM re this issue, or read here: http://wetwebmedia.com/bubtroubfaqs.htm and the linked files above, where you lead yourself. Bob Fenner> Equipment/Overflows/Design - 5/7/2006 Hello to all, <Hello Elvis> Thank you James for answering my last post on return pumps and such. Having so much experience to call on is really wonderful. Have looked all over for an answer to this question and have not found an answer. It's my understanding that dissolved organics tend to collect on the surface of the aquarium water. <Yes.> Targeting this area seems relatively important to the success of protein skimming, or at least it's efficiency. <Does help.> Have you ever seen or heard of a perimeter overflow? <Not aware of one.> Imagine a channel built completely around the perimeter of the tank, say about 1 - 1.5 inches deep and anywhere along this channel is a hole with a bulkhead fitting to allow the water to drain to the sump. Would this not allow the greatest possible surface skimming potential? <Sounds workable/expensive to do.> I know that leveling the tank becomes absolutely critical to the effectiveness of this design but the advantages should be rewarding. I would also think the secondary advantages of this is that it should be almost unseen to the viewer and that the overflow doesn't occupy any considerable volume, unlike the two or three common overflows built into aquariums. Is this just a complication of the overflow principal? Do the existing overflows skim the water at maximum efficiency; or at least as good as they'll ever need to? <With properly sized pumps and surface movement, I believe standard built-in overflows do work as good as they need to. Your design would need a very large pump to create effective surface skimming. Picture a 70 gallon tank with weirs completely surrounding the perimeter as you suggest, then figure out the combined square inches of all the weirs, when all the figuring is done (say with a 1000gph pump), very little flow will be going through each individual weir/slot. Myself, I believe the standard in-tank overflow would be better, especially when you compare manufacturing cost versus effectiveness.> I'm having a tank built and am wondering if I should build it with regular overflows or go for my own design. Figured I'd ask as you wizards of the water seem to have seen it all. Thanks for your time, <You're welcome. James (Salty Dog)> Elvis -Sand and bulkheads- - 5/7/2006 Hello crew! I have two situations today that I hope you can help me with. <Certainly> Situation number 1: I'm starting up (another) new tank, and I am using Nature's Ocean fine sand (not live sand). I didn't realize it until I had already added it, but I'm supposed to rinse this stuff. Now the water's all cloudy and full of gunk. Will this settle in a day or two, or do I need to empty the tank, rinse the sand, and start all over? I don't have enough salt at the moment to do that, so I'd half to wait a day or two regardless. Maybe running a filter on it would help? <The sand "dust" will settle within a day or so, and running an extra filter will help clear up the tank, just check and clean your pumps powerheads etc after it settles to ensure they are not clogged with dust either.> Situation number 2: I had a tank (yet another) drilled for bulkheads. One 1.25 drain (was supposed to be 1.5 but they got it wrong) and two 1" returns. Now I see that all the bulkhead sizes appear to be too big. One inch seems to mean "inside diameter" and my holes are only 1" so...what can I do? Do I just have to take this back and get it re-drilled? It's pretty expensive here (most places charge $30.00/hole). I'm hoping you know of a place online that sells special small outside diameter bulkheads (remember -- MUST fit through a 1" hole). <I do believe that a 1.25" drain is a 3/4" bulkhead fitting. my slightly bigger All glass aquarium one that came in a kit, was about that size. If you can, I would look into having the hole redrilled and get the people that did it wrong to redo it if possible.> Thanks bunches guys! We really appreciate your help out here in cyber-land. Angelica <Hope that helped> <Justin (Jager)> Bulkhead misery - 05/06/2006 I recently got my 75gal AGA tank back from my LFS after having him install a custom overflow as well as drill the back for a bulkhead. I had told him I wanted a 2" bulkhead and that's what he put down for my order and that is what it says on my receipt. However, upon getting my tank back, whoever drilled it only put a 1" bulkhead on it. <... bunk> I was in such a rush at the time I got it, I didn't have a chance to discuss this issue with the guy. Now I am trying to decide if it is worth the effort to get him to fix his problem, or if there is anything that can even be done to 'save' my tank. <Mmm, can be re-drilled... otherwise refit> First, I know I have every right to demand (or ask politely, haven't decided how angry I am yet) that he fix his error. <You are wise to "hash through" w/ yourself, not be angry, emotionally distraught in dealing with this/all matter/s> I just need to hear someone else tell me it's the right course of acting and is worth all the hassle! Second, is it possible for this overflow to work with my setup which will have a 1190gph pump returning water to the tank. <Mmm, no... the present through-put will not accommodate this flow> According to reefcentral.com's head loss calculator I will have appox. 890gph when all is said and done. I know this is cutting it close, but is it better than the alternative of taking it back to get it fixed. <Not IMO... better to have re-drilled. As important as adequate diameter of this fitting, plumbing is, there is also an/the issue of noise... much easier to correct with bigger...> I know only having one overflow is a danger in itself, but I thought that having the 2" drain line would reduce the risk significantly and now that it's only 1", my gut is churning. I guess I know that getting it fixed is my only real option here if I want to avoid disaster. This makes my real question what can be done to fix this by the LFS? The overflow is a 3 sided trapezoid on the middle back of the tank with the bulkhead in the middle of the height of the tank, about 10" up. Could another bulkhead be drilled below/above the existing one so that one acts as a backup? <Yes...> Your suggestions that I can take to the LFS would be greatly appreciated. Up until now I loved this particular aquarium store, but now my experience is soured by this episode. Thanks for listening to my tale of misery, Joel F. <Mistakes happen Joel... do take this up, patiently with the stores management... asking what they might do, suggest to remedy the situation. You do need more through-put here. Bob Fenner> Re: Bulkhead Misery, And fluorescent lambda - 05/07/06 Hey Bob, <<EricR here...Bob's off at another "fishy" event>> Took the tank back in today after talking with him on the phone. He's just going to redrill and fit a new 2" bulkhead on there. <<Great to hear>> He was really apologetic about the whole fiasco. I'm just glad it was so easy. <<Indeed... As Bob stated, sometimes best to "cool down" and present in a calm manner>> On another topic, I am trying to determine what type of lighting would be better for my setup. I was going to go with 4 x 110watt VHO's with 3 being 10k and one being Actinic, but I've also had reefers suggest T5 HO's. <<The current "fad"...the VHOs will be just fine>> The cost for T5's is quite a bit higher from what I've seen and it seems I would also need more like 6-8 T5 bulbs. <<Agreed...VHO gets my vote/is what I use/have used for years>> As far as what these will be lighting, I plan on keeping mostly softies and maybe eventually some LPS or SPS and a Tridacna derasa. Which would be more appropriate for this? <<Not saying the T5s wouldn't work as well, but I have a good friend who keeps all the critters you mentioned under VHO lighting with great success>> Thanks again, Joel F. <<Regards, Eric Russell>> Drain Line Confusion 4/29/06 Hello all! I'm about to have my tank drilled by an LFS and seem to be having a bit of conflict as in the amount of drain lines I need. I had planned on having two 1.5" drains drilled in my 75 gal. but he's trying to get me to only go for 1 2" drain. <You're better off with the two 1.5"> The holes will be on the back as the bottom is tempered. His reasoning is that the 2" can handle the flow from a 1000 gph pump and less holes means stronger glass. <A reasonable statement, however, there will be much better circulation afforded by having two distal overflows, and a margin of safety granted should one become occluded...> This makes sense but at the same time I am worried that the single 2" drain will result in a noise issue. Are my concerns valid? <Yes... though pi R squared for the surface area of both... The two lines can be about as noisy if not engineered properly> If I can should I get him to agree that if I do have issues with noise he will drill another hole without me spending more? <Mmm, up to you, but it's a pain in the keester to take the tank back down and into the shop... if it were me, I'd just have the two holes drilled and be done with it> (the deal is he'll drill and build an overflow for $125) Looking forward to your response. Joel F. <Bob Fenner> A possible Solution to noisy Overflows... not likely a good trade-off 4/26/06 Hi There, <Howdy> Not a question but maybe a solution. I frequently see queries relating to noisy overflows and having spent months trying to solve such a problem would like to share my solution. <Good> My setup is 50 Gallon tank with a siphon overflow box. I could not get any substantial flow rate without a lot of noise, gurgling and air. I tried aspirating with airline which made a small difference. I installed an aquasilencer which is basically a modification of a Durso standpipe for a siphon box, again with some reduction in noise. However I was still not achieving the rate of flow I wanted. By decreasing pump output you will reach a point where almost all noise disappears but this will be at a less than desirable flow rate, particularly if you are trying to run a Miracle Mud sump for which Ecosystem recommend up to 15 times turnover. Consider this flow rate the "quiet flow rate" My solution; Increase output from the pump to as much as the overflow will deal with; ignore the noise and bubbles for now. You now have the maximum flow rate the overflow can handle. <...> Take a length of 3/8 or 1/2 inch tubing and run it from the overflow box to the sump and start a siphon. This siphon is silent. You may need a second piece or a wider bore tube. Basically you want the tube to carry the difference between the "quiet flow rate" and "maximum flow rate". If the tube blocks or loses siphon there is no risk of flooding as the main overflow can handle the total flow rate albeit noisily, and you'll know as soon as you enter the room that something is up. <... what if the pump quits for whatever reason? The siphon will drain the tank to the siphon intake depth... overflow the sump...> It may not be a conventional solution and I have not seen it recommended on WWM before but it turned a noisy intrusive marriage wrecker into a soothing trickle in the corner, so worth a go! David <... I'd think this over a bit... Bob Fenner> Re: A possible Solution to noisy Overflows 4/26/06 Hi Bob, <David> No , the siphon tube cannot empty the tank as it is draining from the overflow box <Oh... thank you for this> so depending on the size of the box it can only move a few litres to the sump. In a "self-starting" style siphon overflow box ,if the end of the tube is kept above the level of the bottom of the primary siphon tube the unit will not "lose" it's ability to restart in the case of a power outage. <I see/understand. Mis-read> I have this up and running and cannot find a logical flaw in the process.. however there is always someone out there who will and I'd be happy to deal with it. David <Does seem/read as a worthwhile "work-around"... though it would be better to aspirate the existing drain line/s from the overflow or increase this... or add another... or drill the tank... Bob Fenner> Re: A possible Solution to noisy Overflows - 04/26/06 Hi Bob, <David> Yes, I agree, drilling the tank would be the best option but not one available to me. Of the MANY lessons I have learned from setting up this small tank, in advance of my "ideal" tank, one is that you cannot have enough overflows and in fact am looking at the possibility of incorporating a full length weir flowing directly into the sump in my next tank. <Neat> I have tried aspirating the overflow but the results are nowhere near as impressive as the additional siphon. <Thank you for this additional input> Keep up the good work. David <Am trying! BobF> SW pump, plumbing et al. wonderings - 04/22/2006 Thanks for the great website. I've looked through the FAQs but can't find the answer to my question so I apologize if you've answered this before. I have a 215 gallon Oceanic FOWLR that I eventually want to go reef. I want to switch to an external pump to both increase turnover and reduce heat. I want to max out on the turnover but I don't know how to figure out what that would be given my outlet system. I have two built in overflow boxes in the rear corners that have 1" bulkheads leading to the sump. What would be the max flow rate external pump that I can purchase that won't pump in faster than it can drain? <Mmm, depends on a few other factors... but I would shoot for a pump that moves 5-600 gph... perhaps a bit more, at the head difference you intend... and throttle the discharge down with valving...> I currently have an internal pump but don't know what GPH it is. It was a package deal so I am assuming it is the lowest I could get away with. They also set it up with PVC extensions raising the water level in the overflow boxes to lower waterfall noise. Will I have to take these out to max out the system? <Mmm, no... once again, depends on what particular livestock, arrangement of hard decor...> I've had a persistent nitrate problem, will the increased flow help to keep organics in suspension and increase their removal? <Yes... one of a few general benefits> Thanks for any help you can give. <Do give a/nother read through the Plumbing, Pump Selection... sections linked here: http://wetwebmedia.com/marsetupindex2.htm Bob Fenner> Re: Overflow rates ... and... sump plumbing period - 04/19/06 Again thanks for taking the time to answer my questions. <Yikes... if pertinent, pls include prev. corr. We have no way of easily tracing who you were chatting with, about...> I have a 55 gal. reef that I am setting up a 10 gal. refugium (small I know but necessary due to space constraints, and I figure some is better than none). I have a CPR overflow box that is rated at 600 Gph. It comes with a 1.250 bulkhead fitting. I want to use flex tubing for the drain line to the Ref. What size pump should I use for the return? <... a "small one"... Providing perhaps three to five times turn over maximum... a need to be cautious here due to the small size of the sump itself... the real possibility of it overflowing with transit volume should the pump fail> Should I put in some kind of valve in order to help balance the overflow with the return? <A good idea... though better if the pump were "about right" w/o valving> Can I just install the overflow w/1.250 flex tube and a clamp and run it to the refugium and then .625 or .750 flex from the pump back to the tank? Thanks. <Mmm, yes. Over-the top... I do encourage you to read here: http://wetwebmedia.com/refugium.htm Particularly the linked files at top on Design, pumps/plumbing... Bob Fenner> Jay W. Thom Equipment/Overflows/Operation 4/12/06 Thanks for all the help you folks provide. <You're welcome.> I'd probably drop this hobby if I didn't have your site to research. I am setting up a 140G tank and had a few questions. 1) My tank is acrylic with two cut-outs. The internal overflow box is very noisy since I have a 30" high tank. (I know it wasn't a smart move but I purchased it for the volume before reading your site and discovering it's quite a bit more work to maintain.) Anyway, I don't want to put in a Durso tube but I was wondering if there was any problem with putting a 15-20" PVC tube onto the overflow so that the water level in the overflow is raised and the subsequent drop is less noisy. Do I have a higher chance of clogging with the tube than without? <Geez, most come with a standpipe. I would cut slits near the top of the PVC, will reduce noise some.> 2) Would I adversely affect my tank by using a piece of Plexiglas to cover my overflow box? <No.> All the noise generated by my setup is from the drop in the overflow box. I have a Megaflow 4 sump and it is pretty quiet. 3) When curing live rock, would it help using a poly filter and/or carbon? <Yes, but a protein skimmer would serve much better.> Thanks again for all the help. <You're welcome. James (Salty Dog)> Mike Sump/Refugium (Overflow?) Confusion - 04/08/06 Hey folks me again. <<Hello "me">> I have a Perfecto 125 gal reef ready with two corner flows. I called the company and they said each overflow is rated at 700gph. <<Mmm, yes..."rated" indeed...but expect only about half that before incurring problems (excessive noise, surge, air entrainment issues, etc.).>> This gives me about 1400gph to use. <<A lot of water to try to push through a sump...hope it's not in your living room.>> I would like to use a Mag 18 for my return and according to spec it will give me a little less than 1400gph with the head length. <<As I've intimated, I think this will be too much flow for your overflows/sump. Go ahead and give it a try...just be prepared to make adjustments/downsize the pump if things don't turn out as you expect.>> I will use a "T" and a gate valve on the return. <<wise>> My question is this. First question I have is can I run a "T" off one of the drains, put a gate vale on it and let it drain into a refuge chamber in a sump. <<You can>> The water would then flow over a baffle to the second chamber. This is where I will be doing the skimming. <<I would design the sump/refugium to skim water 'before' the 'fuge to keep from trapping/removing beneficial plankton/epiphytic matter on its way to your fish's/coral's mouths.>> Then I will pump the water back into the display with the Mag18. If this sounds ok what size should I have for the refuge. <<As large as physically possible.>> I want the main purpose for nitrate reduction. If macroalgae is suggested then what type could I use and feed the extra to the fish. <<My personal fave is Chaetomorpha (is what I use), it provides an excellent, dense matrix for pod/plankton production. But if your looking to feed your fish with the algae, Gracilaria is probably a better choice. Though excellent nutrient export mechanisms, I tend to keep away from Caulerpa species due to their inherent risks (toxicity, sexual events, et al).>> Would it be a problem with the raw water going directly into the refuge portion? <<Nope. I have separate vessels for my sump and refugium...the 'fuge receives raw water from the display which then flows to the pump chamber in my sump.>> The last and biggest question is, I have been looking all over the internet and can not find a sump/refuge that will do the above. Any suggestions. <<Have a look here and among the indices in blue: http://www.wetwebmedia.com/sumpusefaq10.htm >> I don't know if a DIY project would be appropriate with my skills. <<Not all that difficult...really.>> If you have other suggestions for the sump/refuge let me know as I am confused on how to do it right. I know 'right' is a matter of opinion but I trust your opinions. <<Indeed my friend...for a combined unit, my "opinion" is to have raw water flow in to the skimmer chamber (first chamber), then overflow to the refugium, which then overflows to the pump chamber. Baffles to help eliminate excessive bubbles can be installed between the skimmer chamber and refugium chamber.>> Thanks a bunch and I am still reading your site. <<Excellent...lots of material/help abounds.>> With all this knowledge I am starting to look like I am on steroids (hehe). <<Heee! EricR>> Inlet for closed loop manifold - 04/05/2006 Good afternoon WWM crew. <Trevor> I am currently in the planning stages of engineering a closed loop manifold for my 180 gallon AGA. Through your extensive FAQ, which is truly priceless, I believe I can successfully generate the manifold component and also appropriately "size" the pump for the desired flow rate in the display tank relative to head, horizontal run, elbows, tees nozzles. <Yay!> What I have not been able to clearly extract out of this wealth of information is the appropriate inlet size relative to desired flow rates in the display tank. I have come across information on drain rates through bulkheads: ~ 300 gph, 750 gph, 1000 gph for 1", 1.5", 2" bulkheads respectively. Do these aforementioned numbers remain the same if one is "attempting" to aggressively pull water through the inlet with a pump or are they based on a flow rate due to gravity's "pull" alone (my instincts tell me that if most inputs and outputs on external pumps are 1" that a 1"inlet in the display tank should be able to handle whatever the pump is rated ... but I have been wrong before and I am sure I will be again)? <Can't address the last adequately (is a great question/statement), but you are correct in questioning the intake sizes as stated if there is any restriction/vacuum consideration... that is to state, these diameters are idealized for no such restriction, including intake screening> If I have a 2" inlet in my display plumbed directly to the input of a pump of infinite flow rate what would be the maximum flow rate that could be produce, for simplicity, at the output of the pump (I am assuming at some point the 2" inlet has to limit the pumps ability to intake water at a greater flow rate .... <Let's stop here: about 800-1000 gph...> or am I wrong and my flow rate is actually infinite gph)? <Ah, no. There are practical limitations, induced drag, sp3 hybridization, Brownian effects, affinities of water to contend with> I want to maximize the flow rate of my closed loop manifold using a 2" inlet from the display plumbed directly to an external pump, but I do not know what I can expect to maximally pull through the 2" intake. <The above values are about it in practical terms... one can (of course) pull/push more through a two inch diameter line, but there are other considerations, principally screening issues, that need to be addressed> Thank you in advance for the sharing of your knowledge and experience, again, it is truly appreciated. Trevor <Is this clear? You want to avoid "sucking up livestock", cavitation, drawing in air... Bob Fenner> Upgrading after a year 4/4/06 Hello people!! I've had a 70 gallon saltwater aquarium up and running now for a year and now its time to upgrade. The plan is for a 72"l by 24"w by 22"d, what is that about, 150 gallons? <Yes> For drilling the holes I've decided to drill 5 one and a half inch holes across the back top pane of glass, 2" from the top and 2" from the sides, spread evenly across. 3 will be overflows going to a 50 gallon sump and 2 returns to the display tank. Does this sound ok so far? <Yes... but I would make the drain holes two inch... to accommodate 1 1/2" through-put diameter> The glass is 3/8",bottom piece is 1/2" thick. Could you tell me what the best size pump to get for this would be (GPH)? <... posted on WWM> The sump will be directly below the main display tank if that makes a difference. Thanks for now for your wisdom! Steve K <A bunch more to go over Steve... That you may already know... But do read on WWM re plumbing, through-hulls... Bob Fenner> Overflow Drain Placement - 03/27/06 Hey guys, good
afternoon/evening/morning. <<Gals here too...Good Morning>>
One more question about my sump setup. I've got two
returns (on each side) and two (soon to be three) drains plumbed very
near the top (center) of my tank, utilizing strainers attached directly
to the bulkheads, and no overflow box. <<Mmm, much like
mine...>> My problem is because of the location of the drains
(about 1" from the top), one of them creates an almost constant
and irritably loud "sucking" noise as air funnels into it.
<<Yes...know what you mean.>> Ironically enough, this
process seems to be the one thing allowing my drains to keep up with my
oversized pump because the water flow through the drain seems to be
much greater when this is happening. I am going to add a
third drain, hoping that this will alleviate the need for the other
drain(s) to suck in air, and still keep up with the water flow desired.
<<It can't hurt to add the extra drain, but I would like to
suggest you replace the bulkhead strainers with PVC 'elbows'
(you may need to cut/shorten/modify these to suit). These
can be positioned (angled) to pull water from the surface...this will
allow some air to enter and let you "adjust" the water height
in the tank, as well as "skimming" the surface film from the
water.>> My pump is teed off with a valve, so I can adjust the
flow (right now the valve is fully open). Is the water level
in the main tank always going to level off at the point of intake?
<<Usually, though "overdriving" the drains can keep it
elevated slightly as you seem to be doing...a dangerous balancing
act. Best to employ something similar to what I have
suggested.>> I am aware that it possibly was foolish to plumb my
tank like this because of the weak water flow through the drains (due
to lack of pressure at the top?), I just got the impression in my
research that it was alright. <<Is "alright" in my
opinion. Much better than "bottom" drains in the
event a bulkhead begins to leak...won't drain the whole
tank. If these are 1" drains, it's my opinion that
it is unrealistic to try to push more than 300-350 gph per drain...no
matter where they are located.>> Have you heard of any tanks
plumbed like this (with the drains at the top of the tank, and no
overflow box)? <<Yep...mine!>> On a side note, my AquaC
Remora stopped producing skimmate when I placed it in the sump - any
common reasons for this? <<Yes...the fact you are pulling water
from below the surface (bulkhead strainers) in the tank, coupled with
the water turbulence in the sump, reduces the "concentration"
of material the skimmer picks up, thus reducing
skimmate. Placing the skimmer in a skimmer
"chamber" within the sump that receives raw surface water
from the tank can help with this.>> The intake for the skimmer is
very near the top of the sump water level, and there is a lot of water
movement in the sump. Thanks again guys for all your
help. Regards, Chris Stevens <<Cheers, EricR>>
Overflow Drain Placement II - 03/27/06 Eric - thanks for the
reply. <<Quite welcome Chris>> Glad to hear someone else
runs their tank in a similar fashion. <<Yep...Probably more
prevalent than you realize.>> Do you know a good source for BLACK
PVC elbows (1" and 3/4", at least one end male) - ordered one
from marine depot, but it's white. <<Mmm, nope...haven't
ever found black PVC fittings, though I hear they
exist. I've used black ABS fittings before, but I
don't think you can get anything smaller than 1.5" (can be
bushed down)...but then I always buy local (HD, Lowe's), you might
find something smaller on the internet. Likely your best
option will be the gray schedule-80 PVC fittings. You should
be able to find these locally at a home center/hardware/plumbing
store...and at a better price than from a fish shop
etailer. The fitting you describe with the one male end is
called a '90-degree street ell'.>> Thanks again.
<<Regards, EricR>> |
|

|
Features: |
|
| Featured Sponsors: |
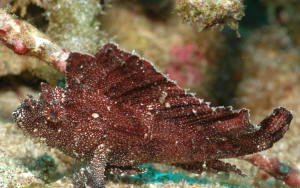 Make sure and
screen those intakes... Motile invertebrates, even slow fishes
can get caught against them.
Make sure and
screen those intakes... Motile invertebrates, even slow fishes
can get caught against them.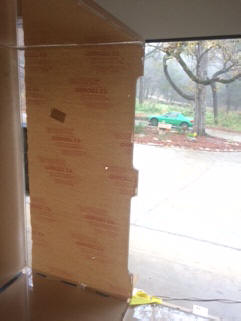 cutouts on right vertical